2019-10-20
OpenBSD 6.6 released early!
2018-10-24
OpenBSD 6.4 released, Web server guide updated
OpenBSD 6.4 was released last week. It comes chock full of new goodies, including a built-in Wireless network manager ('join' syntax for ifconfig), derived snapshots for vmm virtual machine disk images (based on qcow2 support), improvements to pledge including the addition of unveil, and RETGUARD, a new stack protector for thwarting ROP attacks just to name a few new features.
I've been busy with the new job and getting settled into the new digs here in the Austin suburbs, but I carved out some time to update the OpenBSD/HTTPD/MySQL/PHP guide. There are a few changes to how PHP-FPM is configured, so you may want to pay close attention if you've followed the guide before.
The nginx and apache pages haven't gotten that many views lately, so I am not updating them this go-around. The httpd in OpenBSD's base install is a pretty well-proven web server at this point, and I've been using it in production, reliably, for years now. If you're thinking of running nginx or apache on OpenBSD, I'd urge you to take a look at httpd.
2018-09-25
Running pkgsrc on OpenBSD
After a discussion somewhere on teh webs, I decided to dig into the state of PHP 7.1 and PHP 7.2 on OpenBSD. The short version is "we're working on it" (in OpenBSD ports) but no ETA. However, being keen to NetBSD's pkgsrc distribution, I knew that they had been cooking up newer versions in their software tree. So I decided to kick the tires.
Pkgsrc is roughly NetBSD's equivalent to the OpenBSD/FreeBSD "Ports" repository, however, they've put significant effort into making it quite portable. It works in one way or another on other BSDs, Linux, OS X and even more esoteric platforms like Haiku and Illumos.
Initially, bootstrapping pkgsrc on OpenBSD 6.3-STABLE didn't work. Buried deep in my inbox from the pkgsrc mailing list in April, I found a hint from Sevan Janiyan about some patches that are needed to make it work. Partially, this is because OpenBSD uses both clang and gcc compilers in the base distribution on modern hardware.
Anyhow, on with the show.
First, check out the pkgsrc repository. You can do it with cvs:
env CVS_RSH=ssh cvs -d anoncvs@anoncvs.NetBSD.org:/cvsroot checkout -P pkgsrc
It's going to churn for a few minutes while it downloads all the files.
When it's done downloading, you can move it to /usr (/usr/pkgsrc) if you want, but I usually just leave the pkgsrc tree in my home directory. Change into the pkgsrc directory:
cd pkgsrc
make a file called pkgsrc.patch with the following contents:
--- archivers/libarchive/files/libarchive/archive_openssl_hmac_private.h
1 Aug 2017 22:21:17 -0000 1.1.1.2
+++ archivers/libarchive/files/libarchive/archive_openssl_hmac_private.h
5 Apr 2018 20:50:09 -0000
@@ -28,7 +28,8 @@
#include
#include
-#if OPENSSL_VERSION_NUMBER < 0x10100000L || defined(LIBRESSL_VERSION_NUMBER)
+#if OPENSSL_VERSION_NUMBER < 0x10100000L || \
+ (defined(LIBRESSL_VERSION_NUMBER) && LIBRESSL_VERSION_NUMBER < 0x2070000fL)
#include/* malloc, free */
#include/* memset */
static inline HMAC_CTX *HMAC_CTX_new(void)
Apply the patch:
patch -p0 < pkgsrc.patch
cd bootstrap
A "privileged" install requires root (via doas or su) but will store all of the binaries into /usr/pkg:
doas ./bootstrap --compiler clang
-- OR --
If you wish to build "unprivileged" without root, the binary packages will be installed in the "pkg" directory under your home dir.
./bootstrap --unprivileged --compiler clang
Then go have a coffee or something. It takes a while.
If it finishes up with out a screen full of errors, you're almost all the way there:
You'll need to edit your .profile (or .bashrc if you roll that way) to add the pkg/bin directory to your path. In a privileged install, add /usr/pkg/bin and /usr/pkg/sbin to your path. In an unprivileged install, add ~/pkg/bin and ~/pkg/sbin instead.
Adding these paths to the end of the PATH line in the default .profile should work for a privileged pkgsrc install:
PATH=$HOME/bin:/bin:/sbin:/usr/bin:/usr/sbin:/usr/X11R6/bin:/usr/local/bin:/usr/local/sbin:/usr/games:/usr/pkg/bin:/usr/pkg/sbin
You need that in your path, because pkgsrc portable requires you to use NetBSD's "bmake" in the pkgsrc tree, and bmake is compiled as part of the bootstrap. You can log out and log back in, or just run this command to get bmake into your working path.
PATH=$PATH:/usr/pkg/bin:/usr/pkg/sbin
Let's try building something. It works a lot like ports. It will recursively build any dependencies or libraries that are needed, and install them into the pkg directory before building the application you're trying to compile. I'll start with the latest version of PHP in pkgsrc, PHP 7.2, since that's how this whole journey started. I'm using doas since I did a privileged install.
cd pkgsrc/lang/php72
doas bmake
It compiled.
I'm going to run doas bmake install without running bmake test because pkgsrc isn't the boss of me.
And it all works.
2017-04-15
PHP/MySQL Walk-Throughs updated for OpenBSD 6.1
I've stopped maintaining the page for nginx because it hasn't received many views since I updated it about six months ago. I suspect that nginx on OpenBSD is not all that popular because the
httpd that ships with OpenBSD provides almost the same functionality as a
basic installation of nginx. The pages for httpd in base and Apache2 now cover PHP7 and both configurations appear to work really well.
PHP/MySQL on OpenBSD's relayd-based httpd
HiR's Secure OpenBSD/Apache/MySQL/PHP Guide
Feel free to comment on this post if you find any discrepancies or have suggestions. Comments are disabled on the walk-through pages.
(2017-04-23) Edited to add: I went ahead and re-worked the nginx guide, based on the httpd guide with new formatting.
PHP/MySQL with nginx on OpenBSD
2015-06-14
OpenBSD PHP/MySQL Walk-throughs are up to date (Finally!)
First and foremost, I finally took the time to wrap my brain around OpenBSD's new relayd-based httpd. You can see the walk-through here:
While I was at it, I refreshed the guides for nginx and apache.
These should be maintained for future versions of OpenBSD going forward. Enjoy!
2012-01-08
PHP Programming: Clean URLs
I've spent the past two weekends re-writing old, horrible, ugly code that I wrote as a kid. I still have a lot of work ahead of me, and there's still no guarantee that the code I'm writing now will be great, but it'll be better than the stuff I wrote before. I'm not a web developer by any means, but it won't keep me from having some nerdy fun on the weekend. I've learned some tricks, and figured I'd share them here in a few short entries. Today, it's so-called "Clean" URLs.
In most dynamic web scripting languages such as PHP, dynamic pages can be accessed by passing parameters through a query string. As an example: http://foo.somesite.com/article.php?p=42
You've undoubtedly seen dynamic websites that don't pass query strings, but instead generate nice, friendly URLs that look more like this: http://foo.somesite.com/article/Hello_World
Clean URLs are easier to link to, they're better for search engine optimization, and with proper implementation provide a few security features as well. The project I'm working on is a custom CMS that was my very first Apache/PHP/MySQL project. It ended up getting kind of popular among a niche crowd, so I left it online in all its ugly glory. I have an article list script that can filter articles by category, and another script to display the articles. I'll just call them list.php and article.php here for the sake of discussion.
Removing .php from the URL

$category=(end(explode('/', urldecode($_SERVER['REQUEST_URI']))));
if(($category) && ($category != 'list.php' && $type != 'list'))
{
$rawcat=str_replace('_', ' ', $category);
$list=getlist($rawcat);
$title=$rawcat." Articles";
}
else
{
$toc=TRUE;
$list=getlist();
$title="Table of Contents";
}
Labels: mysql, php, programming, seo
2011-11-12
OpenBSD 5.0: Apache, PHP and MySQL
The basic steps for taking a bare-bones install of OpenBSD and adding an AMP stack for web applications hadn't changed much in the past 2 years. Although 5.0 is not seen as a "major update", but simply a continuation of the normal development cycle, the OpenBSD team did a few things that make the installation a bit different this go around. I'll cover some of the recent changes to OpenBSD and its packages in this post, then you can dive right into the updated OpenBSD Chroot Apache, PHP, MySQL setup guide.
Initialization scripts: Starting with OpenBSD 4.9, the RC scripts became modular. This is similar to how NetBSD and FreeBSD have worked for many years. Individual daemons have startup scripts in /etc/rc.d, but rc.conf, rc.local and rc.conf.local still work the same, so it wouldn't surprise me if many OpenBSD users didn't even notice the change. It seems like OpenBSD 5.0 packages for most of the popular services (samba, cups, postgres, etc) are actually creating these startup scripts now. If a third-party application from packages installs a startup script in /etc/rc.d, you can add it to the pkg_scripts variable in /etc/rc.conf.local like so, and it'll magically start.
pkg_scripts="mysqld cups samba"
See the OpenBSD man page for rc.d for more details.
MySQL and chroot: I'm not sure why it didn't dawn on me before, but one really simple way around hard-linking MySQL's socket file into the chroot environment is to simply have your web applications connect to MySQL's TCP port on 127.0.0.1 (not localhost, because that means "use the socket file" in MySQL-ese) I think I'll be doing it this way in the future.
PHP: PHP 5.3 added a lot of features, such that PHP 5.2.x and PHP 5.3 might as well be different major version numbers when complex web applications are considered. OpenBSD 5.0 adds packages for PHP 5.3 for the first time, but PHP 5.2 is still available in the repository. For this reason, the PHP core and module packages are no longer prefixed by php5-, they're just php, php-mysql, etc. Since PHP 5.2 is still supported, the version numbers are used to distinguish them, like this:
$ sudo pkg_add php-mysql
Ambiguous: php-mysql could be php-mysql-5.2.17p3 php-mysql-5.3.6
Further, some configuration file locations have been changed. If you pay attention to the text after installing packages, this shouldn't make much difference. Hint: you can always re-read the post-install notes afterward by using pkg_info -M.
All in all, the recent changes to OpenBSD are welcome. Some of the things I outlined here are areas where OpenBSD had some catching up to do. They've managed to do a lot of proactive stuff in the realm of hardware support and (of course) security and encryption. This is still one of my favorite platforms to tinker with.
2010-12-02
Automate posting links from Delicious to Blogger
As you can tell, I've been playing with a way to create real blog posts from Delicious, not just an RSS feed splice. The old feed splice was being done with Feedburner, and it usually worked pretty well, but it lacked the flexibility I wanted and furthermore, it wouldn't actually create a post here. It would only show up in the RSS feed.
Labels: php, programming
2010-10-18
OpenBSD 4.8 is almost here! Chroot Apache, MySQL and Suhosin Hardened PHP
I actually cheated a bit to make this article, if you can call busting my ass performing a "make package" for hundreds ports in OpenBSD-current and doing a bunch of Virtual Machine snapshot reversions "cheating." It was a major pain in the butt to do, but I won't have much free time when OpenBSD 4.8 actually ships, so here you have it.
My Chroot OAMP series of articles is pretty popular, especially since attacks against PHP web applications are on the rise and people are looking for ways to get a little extra security for their web hosting environments.
By default, OpenBSD ships with a specially patched and code-audited derivative of Apache web server. It has been engineered specifically to run in a chroot environment, which is to say that even if someone or something could make Apache run arbitrary code, it can only impact what's in the web directory. It can't readily harm or disrupt the rest of the system.
The version of PHP in OpenBSD's package repository has also been tweaked with the Suhosin Hardened-PHP patch, which can defend vulnerable PHP applications from certain kinds of malicious attacks.
A relatively current version of MySQL is also in the package repository. The configuration provided isn't too bad.
Getting the software installed is easy, but turning it into a functional and secure AMP environment can be a chore if you haven't done it before.
Preparation:
During the installation of OpenBSD, you are prompted to create a non-root user. This feature was introduced last year with OpenBSD 4.6, and is primarily to discourage the improper use of the root account. The user you create during installation will be automatically added to the wheel group, which grants permission to use the su command. I generally add the wheel group to sudo as well, by adding this line to /etc/sudoers (with the root user):
%wheel ALL=(ALL) SETENV: ALLIf you are currently logged in with your user-level account, you will need to log off and log in again in order to use sudo.Package management used to be one of the more annoying aspects of OpenBSD. In 2004, I even wrote my own scripts to wrangle the packages. They've gotten consistently better over the years, and with OpenBSD 4.8, they introduced yet another great feature: /etc/pkg.conf (manual page .) There are only a few options available for this file right now, but it allows you to set global options for the package tools instead of setting up and relying on the PKG_PATH environment variable. If you perform an FTP install, the installer should automatically add the FTP mirror you used to this file. If you installed from CD but would like to use an ftp mirror for pkg_add, you need to add an "installpath" line to /etc/pkg.conf, which may not exist yet.
installpath=ftp://ftp5.usa.openbsd.org/pub/OpenBSD/4.8/packages/i386Of course, you can pick whichever mirror you like. The OpenBSD project maintainers frown upon pointing direct downloads at the main ftp site. You can easily add local package repositories to this path.
Installing Packages
Installing php5-mysql and mysql-server will fetch all of the dependencies for OAMP. This process may take a while depending on your connection speed. There are several dependencies that will be installed, including php5-core and some perl modules.
sudo pkg_add php5-mysql mysql-serverNext, copy the PHP + MySQL sample files into placesudo cp /var/www/conf/modules.sample/php5.conf \Run the script to get the default MySQL database installed, start MySQL and set a MySQL root password./var/www/conf/modules/
sudo cp /var/www/conf/php5.sample/mysql.ini \/var/www/conf/php5/
At this point, both MySQL and PHP are installed and set up with a default configuration that will probably work fine for most applications.sudo /usr/local/bin/mysql_install_dbsudo /usr/local/share/mysql/mysql.server startsudo /usr/local/bin/mysqladmin \-u root password 'your-password'
Chroot Setup
In this version of OpenBSD, a chroot /tmp directory already exists with the proper permissions in /var/www, which simplifies setup of the chroot environment. All we're left to do is to reproduce the directory structure for the MySQL socket under /var/www.
sudo mkdir -p /var/www/var/run/mysql # -p creates subdirs as neededStart Apache and MySQL at bootSet apache to start on boot by editing /etc/rc.conf. Find the httpd_flags line in the file, change NO to "" -- literally, two double quotes as shown below.
Then, make sure that MySQL starts at boot and that the real mysql.sock file gets hard linked into the new directory by editing /etc/rc.local. I also added a line to remove the old hard link before starting MySQL. The end of my /etc/rc.local looks like this:# use -u to disable chroot, see httpd(8)httpd_flags=""
rm /var/www/var/run/mysql/mysql.sockAfter getting all of the services set up to start automatically, I usually reboot to make sure everything starts up as expected.
/usr/local/share/mysql/mysql.server starr
sleep 5
ln /var/run/mysql/mysql.sock /var/www/var/run/mysql/mysql.sock
sudo rebootTesting
Once the system comes back online, the most basic test of Apache and PHP is to create a phpinfo script. This can be done with one line of shell-fu, which will launch "tee" with root permissions to write the phpinfo.php file.
echo "<?php phpinfo(); ?>" | sudo tee /var/www/htdocs/phpinfo.phpThen, navigate to http://your.openbsd.ip.address/phpinfo.php in your web browser. It should load a nice-looking document containing details about PHP's configuration. In particular, check for MySQL.
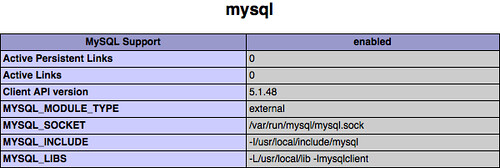
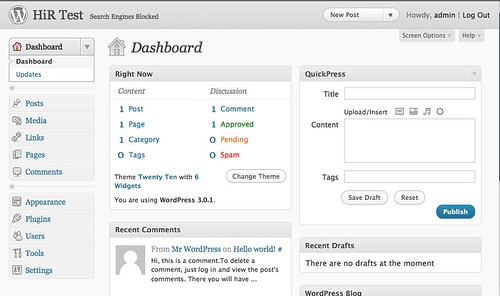
To wrap up, I performed the usual "5 minute install" of Wordpress 3.0.1 (current as of writing) to see what happens. The end result was a totally painless and fully functional setup that's ready to go.
2010-05-17
OpenBSD 4.7 + Chrooted Apache, MySQL & Suhosin PHP
FYI - There's now a page that covers OAMP for all recent versions of OpenBSD. My OAMP series is a popular one. Although OpenBSD 4.7 doesn't come out for 2 more days, the media has already shipped to those who pre-ordered. And, as I mentioned previously, you'll want to get crack-a-lacking on those patches. As of the time of writing, there are already 4 patches to install for OpenBSD 4.7, which affect all architectures.
I'll spare you the verbosity. The installation procedure for getting OpenBSD, Chrooted Apache, MySQL and Suhosin-hardened PHP all working together hasn't changed one bit in OpenBSD 4.7. You can follow my instructions verbatim from the OAMP 4.6 Walk-Through, with one minor difference: make sure you change "4.6" to "4.7" when defining PKG_PATH in your .profile.
I was able to go from an empty virtual machine to a fully-functioning, chrooted install of WordPress in under 30 minutes just by following the instructions (and, of course, pointing the PKG_PATH to the packages on the media, not FTP, since the 4.7 branch hasn't hit the Internet yet)
Now that blogger has the ability to store "pages", I may eventually convert this article series to a living document. There are also some lazy shortcuts I take that kind of go against traditional OpenBSD methods (directly launching stuff from rc.local, editing rc.conf instead of making changes in rc.conf.local, etc) - I may get around to de-cruft-ifying this how-to at the same time. Otherwise: Enjoy!
2010-03-24
Guest post: Pulling audio from YouTube with PHP and ffmpeg
sudo pkg_add install pear php5-curl ffmpeg (and then copy the sample php5-curl config into place)
sudo pear install console_commandline
The attached script requires the following... I've noted the Ubuntu packages and they should match Debian, other linux and/or BSD distros should be similar. Windows MSI installer should just be a simple matter of ticking off the options.
- PHP 5.2+ CLI (php5-cli) with cURL installed (php5-curl)
- PEAR's (php-pear) Console/CommandLine
- ffmpeg binary should be in your environment $PATH and should have access to libmp3lame
I have no idea why people enjoy listening to music as videos with a static image, but Youtube is full of these as well as music videos and people playing their own remixes or original music. If I hear something I like I then try to get it off of emusic, itunes, directly from the artist at a show, or somewhere else. Sometimes the music just isn't available yet (no official CD/mp3 release) or the tunes are available directly off the musician's website, but there's a better/live remix on Youtube...
I found myself listening to something the other night and I was able to find plenty of tracks from the artist on emusic and itunes, but not the particular track. In 1 of the comments somebody asked where they could get a copy of the track and a reply mentioned mp3ify. I googled it and found http://www.mp3ify.com/ which I initially used to grab the mp3. After using it 2 or 3 times it screamed at me for not making a donation so I figured I should be able to figure out how they did it and stop wasting somebody else's bandwidth and processing time. Not to mention the more control I have over something the more control I have over my results.
I have flashgot installed and it allows me to download the flv (flash) files on Youtube pages, but it wasn't letting me see what the URL was and the only flv that I was easily finding in the HTML code was the player. Flashgot does allow you to add downloaders and send the downloader various different options including URL, cookie data, referer URL, etc. I wrote a quick shell script that would dump this information to a text file and used this information in my various attempts to grab the flv from Youtube.
Note: I must have really needed sleep because I completely forgot that I could have had an easier time grabbing the URL and cookie data from firebug.
I haven't done extensive testing, but the Youtube cdn seems to require a combination of several settings. I found that the I couldn't grab the flv without having certain cookie data, a referer URL, a "valid" User-Agent string, and a particular URL. The User-Agent it may not care about as I was rushing my testing, but I couldn't seem to get wget or curl to download the flv without setting it to a Firefox UA string. It seems to want certain cookie data, but I'm not sure how much of the cookie data is relevant vs the generated timestamp in the flv's URL - again, I was rushing this.
From what I can tell Youtube creates a javascript object named yt and adds settings to it via the yt.setConfig() function. This yt.setConfig() can accept single key/value pairs [i.e. yt.setConfig('LOGGED_IN', true);] or large JSON objects with several key/value pairs. In 1 of these large objects the value for
is set (needed for modifying the URL) and the flv URL is listed within the VIDEO_TITLE
key which is a property list and the particular value I found the URL listed in is SWF_ARGS
. The value for fmt_url_map
is URL encoded with a pipe seperating 3 values. The 1st value is a number, the 2nd value is the URL that I used for the flv, and the 3rd value is another URL (I'm not sure what this URL is for). This 2nd value that I used as the URL is mostly correct, but can't be used without being modified. At the very end of the URL is a comma followed by a couple of characters, these need to be trimmed off the end and replaced with fmt_url_map
+ a modified version of the &#/
+ VIDEO_TITLE
. _video.flv
I've only seen a limited set of translated characters in the modified
. So far I've only seen space (VIDEO_TITLE
), dash (-
), period (.
), and ampersand (&
) are converted to an underscore (_
) and square brackets (both [
and ]
) are removed. I'm guessing there's a larger set of translated characters, but I'm not sure what they are... I'm also not sure how important it is to get these correct as at least 1 of my attempts had an incorrect name, but worked anyway (I would prefer to use a correct name just in case so it doesn't cause any red flags).
Honestly I'd prefer to run the html page through some shell utility (possibly rhino) that could process javascript and output the variables needed so I could let Youtube's code do it's own work. That would also make it more forward compatible if Youtube decided to change how they structure their URLs or something. In the meantime I used a combination of grep and sed to initially pull out the values I needed (exchanged for preg_grep() and preg_replace() in PHP code).
The final part was to convert the flv to a different format. I've used ffmpeg in the past for converting between media formats, but this was the 1st time I've used it to convert an flv. There are several nifty things that ffmpeg can do - merge raw video files with audio files, transcode decrypted VOBs into a video+audio format, audio and/or video conversions (i.e. wav into mp3), etc. I googled for ffmpeg convert flv to mp3
to get some quick solutions... 1 of the solutions I found suggested using
, but I couldn't get that to work. Initially I dropped back to mp2, but later discovered I needed to use -acodec mp3
instead. I should probably also state that -acodec libmp3lame
is valid, but could cause problems if the embedded audio is in a format that isn't acceptable in an mp3 wrapper. -acodec copy
The other switches on ffmpeg I'm using are
(setting the audio channels to 2), -ac 2
(the audio bitrate), -ab 128k
(disable video recording - don't need the video for an mp3), and -vn
(overwrite output files). There are many other switches available and I've thought about adding the following (possibly via some switches set up in Console/CommandLine) - -y
, -title string
, -author string
, -copyright string
, -comment string
, -album string
, and -track number
as these should populate the fields in the id3 tag. -year number
The final bit is more of a pet peeve than anything that's really needed. My preference is to set the date on files to match what's on the server - otherwise how do you know if it's been modified. If you don't want or need this, feel free to comment out the if statement surrounding the
as well as the curl_getinfo( $ch, CURLINFO_FILETIME )
section at the very end right after the if ( !touch( $file_mp3, $GLOBALS['server_filetime'] ) ) {
. passthru( $cmd );
Download:
get-youtube (syntax highlighted)
get-youtube (plain text source code)
Labels: guestposts, music, php
2009-10-28
OAMP: OpenBSD 4.6 + Chroot Apache + MySQL + PHP
Introduction
I'm combining the OAMP howto with chroot from the start this time because it's really the proper and secure thing to do. You can read more about how chroot works in my last article about it, but the premise is that chrooting Apache limits the amount of damage that can be caused by vulnerabilities in web applications. Keep in mind that we'll be accessing MySQL from within the chroot in this article, so all content within MySQL is potentially at risk if you're serving up SQLi-vulnerable content. The best things the average sysadmin can do to protect the server is to keep webapps and system patches up-to-date, and to perform periodic database dumps and system-wide backups.
I will walk through the commands here without showing the output they generate. You can reference my OAMP walk-through from OpenBSD 4.4 if you want to see example output, which should look similar for OpenBSD 4.6. The output shouldn't matter much, because I'll walk you through everything here.
Preparation
To start off, I make sure that a user-level admin account has access to run anything as root from sudo. Note: all the administrative commands in this post begin with "sudo" for a reason. To do this, I add my admin account to the wheel group. You can do this during the adduser process or with usermod, but if you created a non-root admin user during the OpenBSD 4.6 installation process, that user will be in the wheel group by default. All you need to do is add a sudo rule for the wheel group. It's commented out in /etc/sudoers.
$ su -
Password:
# visudo
... or use whatever editor you want on /etc/sudoers. Not recommended.
Find the line that grants access to the wheel group, and uncomment it. It's about 35-40 lines down in the default configuration. Optionally, there's a NOPASSWD version of the same, a few lines down. I don't recommend using this option on a production server, but it may make system management more friendly on your development servers and workstations.
%wheel ALL=(ALL) SETENV: ALL
-- or --
%wheel ALL=(ALL) NOPASSWD: SETENV: ALL
I also set up the path for pkg_add by adding these lines to my user-level account's .profile, then logging out and back in to reload the profile. I usually use an OpenBSD mirror, like ftp5.usa.openbsd.org instead of the main FTP site. You can also use any of the http mirrors in this path.
vi .profile
PKG_PATH=ftp://ftp5.usa.openbsd.org/pub/OpenBSD/4.6/packages/i386/
export PKG_PATHInstalling PackagesInstalling php5-mysql and mysql-server will fetch all of the dependencies for OAMP. This particular version of PHP comes pre-compiled with the suhosin hardened PHP patches in place, which is a nice touch! This process may take a while depending on your connection speed. There are eight or nine packages in total, including php5-core and some perl modules that MySQL depends on for its management tools.
sudo pkg_add php5-mysql mysql-serverNext, copy the PHP + MySQL sample files into placesudo cp /var/www/conf/modules.sample/php5.conf \Run the script to get the default MySQL database installed, start MySQL and set a MySQL root password./var/www/conf/modules/
sudo cp /var/www/conf/php5.sample/mysql.ini \/var/www/conf/php5/
At this point, both MySQL and PHP are installed and set up with a default configuration that will probably work fine for most applications.sudo /usr/local/bin/mysql_install_dbsudo /usr/local/share/mysql/mysql.server startsudo /usr/local/bin/mysqladmin \-u root password 'your-password'
Chroot Setup
Most AMP packages only need somewhere to store Session information and a way to get to the MySQL socket. Since the real /tmp contains information that is not needed for Apache, we'll just create a new tmp directory specifically for Apache within /var/www and make it world-writable with the "sticky bit" set (exactly like the real /tmp)
sudo mkdir /var/www/tmpNext, reproduce the directory structure for the MySQL socket under /var/www.
sudo chmod 1777 /var/www/tmp
sudo mkdir -p /var/www/var/run/mysql # -p creates subdirs as neededStart Apache and MySQL at bootSet apache to start on boot by editing /etc/rc.conf. Find the httpd_flags line in the file, change NO to "" -- literally, two double quotes as shown below.
Then, make sure that MySQL starts at boot and that the real mysql.sock file gets hard linked into the new directory by editing /etc/rc.local. I also added a line to remove the old hard link before starting MySQL. The end of my /etc/rc.local looks like this:# use -u to disable chroot, see httpd(8)httpd_flags=""-or-httpd_flags="-u" #disables chroot. You can if you want.
rm /var/www/var/run/mysql/mysql.sock
/usr/local/share/mysql/mysql.server start
ln /var/run/mysql/mysql.sock /var/www/var/run/mysql/mysql.sock
After getting all of the services set up to start automatically, I usually reboot to make sure everything starts up as expected.
sudo reboot
Testing
Once the system comes back online, the most basic test of Apache and PHP is to create a phpinfo script. This can be done with one line of shell-fu, which will launch "tee" with root permissions to write the phpinfo.php file.
echo "<?php phpinfo(); ?>" | sudo tee /var/www/htdocs/phpinfo.php
Then, navigate to http://your.openbsd.ip.address/phpinfo.php in your web browser. It should load a nice-looking document containing details about PHP's configuration. In particular, check for MySQL.

To really put our fresh chrooted OAMP installation through its paces, I downloaded the latest version of Wordpress, then followed the instructions using "the famous 5-minute install", which is way beyond the scope of this article. It's as simple as creating a database, setting up a privileged user for that database, editing a configuration file and copying wordpress into /var/www/htdocs (or a subdirectory) before accessing the control panel to finish up.
The wordpress install worked without changing anything from the instructions, and it's all running under chroot without any problems!

If you find that things are not working well with a particular AMP application, check file permissions, and copy or create hard links to files or directories that are needed. Example: sometimes you need a fake /etc/password file, some tools from /usr/bin or a /dev structure to be replicated within the chroot environment. Add these only as needed.
2009-10-02
Solving transit questions with PHP
When I saw Visualmotive's "Walk or Bus?" chart, I was fascinated. I love stuff like this! It answers the question of "If I have to be somewhere, is it going to be faster to wait for a bus, or just start hiking?"
I am a multi-mode commuter. I often use my bike combined with the bus to get myself downtown. Sometimes, I also need to get around the city. I almost always do this on my bike unless it's somewhere really close. Still, I felt compelled to create a chart that included bicycling, as well as walking.

I ended up making a quick program in PHP to draw the main part of the above chart for me. I sourced the icons from the same place Visualmotive did (icons.mysitemyway.com) but opted to modify their icon colors, then added the headers manually in GIMP. I'll upload a .zip file (and link to it) later, with the icons.
The code is pretty simple and very ugly. Not only did I use tables (ew) but I also barf out HTML with PHP. This is why I say there's a massive difference between programmers (like me) and developers (who code for a living).
<html><head><title>Walk, Bike, or Bus?</title></head><body>
<TABLE cellpadding='0' cellspacing='0'><TR>
<TD></TD><TD><CENTER>1</CENTER></TD><TD><CENTER>2</CENTER></TD>
<TD><CENTER>3</CENTER></TD><TD><CENTER>4</CENTER></TD>
<TD><CENTER>5</CENTER></TD><TD><CENTER>6</CENTER></TD>
<TD><CENTER>7</CENTER></TD><TD><CENTER>8</CENTER></TD>
<TD><CENTER>9</CENTER></TD><TD><CENTER>10</CENTER></TD>
<TD><CENTER>11</CENTER></TD><TD><CENTER>12</CENTER></TD>
<TD><CENTER>13</CENTER></TD><TD><CENTER>14</CENTER></TD>
<TD><CENTER>15</CENTER></TD><TD><CENTER>16</CENTER></TD>
<TD><CENTER>17</CENTER></TD><TD><CENTER>18</CENTER></TD>
<TD><CENTER>19</CENTER></TD><TD><CENTER>20</CENTER></TD>
<TD><CENTER>21</CENTER></TD><TD><CENTER>22</CENTER></TD>
<TD><CENTER>23</CENTER></TD><TD><CENTER>24</CENTER></TD>
<TD><CENTER>25</CENTER></TD><TD><CENTER>26</CENTER></TD>
<TD><CENTER>27</CENTER></TD><TD><CENTER>28</CENTER></TD>
<TD><CENTER>29</CENTER></TD><TD><CENTER>30</CENTER></TD></TR><TR>
<!-- Model View Controller what? -->
<?php
$Miles=.2; # .2 Miles. Just walk it. Jeez.
while ($Miles <= 4.0){
$Miles=$Miles+.1;
$TravelTime['Bus'] = $Miles * 4; # Bus ! 15 MPH (4:00 mile)
$TravelTime['Bike'] = $Miles * 7.5; # Bike ~ 8 MPH (7:30 mile)
$TravelTime['Brisk'] = $Miles * 15; # Brisk walk ~ 4 MPH (15:00)
$TravelTime['Walk'] = $Miles * 20; # Walk ~ 3 MPH (20:00)
$Mins=0;
print "<TR><TD><CENTER>$Miles</CENTER></TD>" ;
while ($Mins < 30){
print "<TD><CENTER>";
$Mins++;
if ($Mins >= $TravelTime ['Walk'])
{print "<IMG WIDTH='45' SRC='img/iconwalk.png'>" ;}
elseif ($Mins >= $TravelTime ['Brisk'])
{print "<IMG WIDTH='45' SRC='img/iconbrisk.png'>" ;}
elseif ($Mins >= $TravelTime ['Bike'])
{print "<IMG WIDTH='45' SRC='img/iconbike.png'>" ;}
else
{print "<IMG WIDTH='45' SRC='img/iconbus.png'>" ;}
print "</CENTER></TD>";
}
print "</TR>"; #I know you're not supposed to print HTML. Byte Me.
}
?></body></html>
So, what started as a desire to have a cool chart to share with other bicycling/pedestrian friends of mine turned into an exercise in algorithms last night, with a little bit of PHP programming tossed into the mix. This is yet another example of a quick-n-dirty program I wrote for something simple.Labels: php, programming, transportation
2009-05-11
PHP Editing In The Cloud
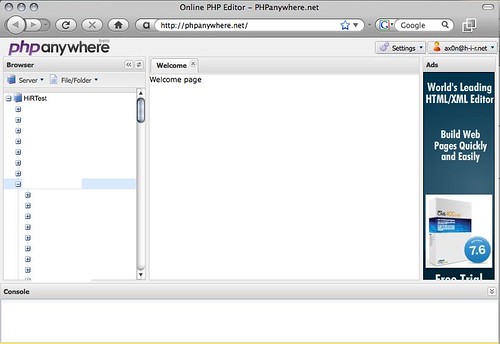
I ran across PHP Anywhere over the weekend. At first glance, it looks as feature-rich as the free version of PHP Designer, a Windows-only tool I use at work when I have to mess with PHP (which isn't too often)
There's just one question I have: who in their right mind would store the FTP password to their web site "in the cloud" like this? In fact, I don't even have FTP access ENABLED on my primary web server. I set up a test instance somewhere else to play with PHP Anywhere. I usually scp my files to their destination. Sadly, that's not an option for PHP Anywhere yet, but if it did, you'd still be storing credentials to modify your website...
I suppose if you are really in a crunch somewhere and lack your usual desktop IDE of choice (and for some reason can't get on the system to edit it locally), it makes for a neat toy.
That's all for today. I'm going to change my password on that FTP account now...
Labels: cloud, InfoSec, php, programming, rant
2009-05-01
Securing Php Web Applications
PHP is a popular server side scripting language, it's as simple or as complex as you want to make it. It is typically used along with Linux, Apache Web server and MySQL RDBMS. In most web applications the script acts on user provided information and returns processed data. To this end there are a number of simple steps you can take to help make your web application less vulnerable to exploitation by an unfriendly party.
This article is intended for beginning to intermediate web application programmers.
=======ToC=========
1. Introduction
2. Methods of input
3. Input data validation
4. Trusted processing
5. Database queries
6. Raising the bar
7. Informative resources
===================
1. Introduction
PHP is a HTML pre-processor, meaning that it reads a file before it is sent to the user and if it contains PHP script, it processes it and returns the document and the processed results to the user. There are many other technologies which do the same thing each with their benefits and flaws. The importance here is not to proclaim the benefits of PHP over the others but to show some good ideas of how to protect your applications from un-friendlies.
2. Methods of input
In PHP we can get information externally from the webserver itself ($_SERVER), Cookies ($_COOKIE), Get variables ($_GET), Post Variables ($_POST) . In addition PHP can internally connect to just about anything.
Example:
So when Joe, our end user goes to your website to check this weeks Fantasy Football scores on your website, he will login (sending login information using POST variables) to a script which then reads the login information and decides whether he can login. Then it returns a page with the result of his attempt and then either takes him to the next page or back to the login prompt. Once he is logged in, PHP sets a Cookie with a unique random session id. Every time a browser returns that cookie to a page, it knows that this session is good and belongs to Joe. Then Joe sorts his results page sending some criteria via a Get variable which is used to control a query to the sports database.
The important thing to know is that Joe can control everything he sends to the server. He can see the cookie contents, post data and get variables. Lets say that Joe wants to check a friends team score. The site allows Joe to sort his scores using GET variables. Joe just places in an escape character and appends some SQL to view his friends score.
3. Input data validation
Think of a web application like a game of D&D, if you are out on the desert plains with a 12th level Barbarian named Ogar, whats keeping the player from making Ogar go left when the DM expects the player to go right? There is no reason Ogar the barbarian can't sit down and whittle a set of dice, mark up a parchment with character stats and then play Cube farms & Bosses.
You have a nice HTML page which provides for the intended actions of the user but everything in the browser or on the computer is out of your control. Java script, plug ins, input, cookies and URLs are not controllable and therefore cannot be fully trusted.
The key is limiting the users choices, and abstracting their decisions. If your scripts inputs expect a phone number, then the input should only be numbers or else its invalid. If there is only search methods A,B or C then if the input isn't A,B or C then it has to be invalid. Simply filtering out known bad data such as embedded javascript isn't 100% effective, if the data type is contaminated it cannot be trusted.
The quality of the data you take in is important, the other part of this is abstraction of the users decisions. If a persons available choices are A,B and C, and internally you identify A, B and C as actions and everything else as false input then that is more effective than allowing user input directly control your data.
4. Trusted processing
Assuming that you have done your due diligence and secured your server, it is more trustworthy of a computing platform than your clients workstation. A clients workstation could be infected with mal-ware, it could have a malfunctioning or obsolete browser or the user could intentionally manipulate the http variables to trick the application. Input validation cannot be done using JavaScript alone, trusting JavaScript or any other plug in to obfuscate your applications process just isn't a good idea. Client side scripting is good for enhancing the presentation and for providing a means to communicate information effectively to the user but it should not be relied upon to process information.
5. Database queries
Filtering valid data is just one step, the other step is on your data sources such as MySQL, Postgres, Oracle ... most modern Databases allow you to do a prepared statement which auto-magically binds input into a SQL string. Because its binding data directly to a variable the chances that a user's escape string can hijack the SQL query is greatly diminished. By limiting the users input to only data and not to the program execution process you greatly reduce the possibility of your script becoming compromised.
For example:
"http://example.com/mypage.php?display=select * from mydatabase.mytable where user=Joe order by date;"
Including SQL in a user accessible variable is a really really bad idea. Even if it is on a link that Joe wont see and Java script is used to obscure the URL. Joe controls the machine so any obfuscation used will never be effective. What is stopping Joe from substituting "select 'joe' as user password as score, currdate() as date from mysql.users where username=root;"?
6. Raising the bar
There are alot of "Magic Bullet" solutions to web application security. Application firewalls monitor information going both to and the web application. SQL application firewalls filter out suspicious SQL commands going to your RDBMS server. For most developers, these solutions are
either too expensive or too complex to implement for individual web applications. Here are some PHP security plug ins and tools to help raise the bar on the cheap.
When you use this or any other security plug-in, it is vital that you evaluate your applications baseline performance to know what is normal behavior. For instance PHPBB2, a popular PHP bulletin board application display a large list of forums. And mysteriously the settings would not save. I was using Suhosin and this was caused because the number of variables being posted was above Suhosin's default limit and the script was aborting before it could save the changes.
On the server side there is Green SQL, which is a MySQL sanitizer/proxy. Then there is mod_security which hardens Apache and turns it into an application firewall. mod_chroot is similar in the basic functionality of mod-security except it just chroots Apache transparently to the user. Then there are web application security scanners such as the ones included in Nesssus.
Wapiti checks for cross-site scripting (XSS), injection and other common issues. OWASP's WebScarab is a good utility for testing user access to http variables on the client side and intercepting the raw http conversation between the client and the server.
7. Informative resources
Breach Security "Mod Security home page". (Accessed April 2009)
http://www.modsecurity.org
Dawes, Rogan "OWASP WebScarab Project" (Accessed April 2009)
http://www.owasp.org/index.php/Category:OWASP_WebScarab_Project
Esser, Stefan "Hardened PHP Project" (Accessed April 2009)
http://www.hardened-php.net/suhosin/
Freitag, Pete "20 ways to Secure your Apache Configuration" (Accessed April 2009)
http://www.petefreitag.com/item/505.cfm (Posted Dec 5, 2005)
Green SQLProject "Green SQL home page". (Accessed April 2009)
http://www.greensql.net
Hobbit "mod_chroot" (Accessed April 2009)
http://core.segfault.pl/~hobbit/mod_chroot/
OWASP Foundation. "Main Page" (Accessed April 2009)
http://www.owasp.org/index.php/Main_Page
Tenable network security inc. "Nessus Product Page" (Accessed April 2009)
http://www.nessus.org/nessus/
The Apache Foundation. "Apache HTTP Server Project". (Accessed April 2009)
http://httpd.apache.org/
The PHP Group. "PHP: Hypertext Preprocessor". (Accessed April 2009)
http://www.php.net/
Surribas, Nicolas "Wapiti Web application vulnerability scanner / security auditor" (Accessed April 2009)
http://wapiti.sourceforge.net/
See also:
Ax0n's OAMP (Apache, Mysql, PHP on OpenBSD) Article:
http://www.h-i-r.net/2008/12/sysadmin-sunday-amp-on-openbsd-44.html
Asmodian X's Name based hosting mini-howto:
http://www.h-i-r.net/2008/10/sysadmin-sunday-apache-name-based.html
Asmodian X's Workbench - Suhosin :
http://www.h-i-r.net/2008/12/asmodians-workbench-suhosin-hardened.html
Labels: amp, apache, application security, password, php, Websecurity
2008-12-23
Asmodian's Workbench: Suhosin Hardened PHP extension and patch.
Suhosin is a plug-in and patch for PHP. It places a white-list filter of actions which are allowed. It prevents a pile of PHP exploits from happening such as buffer overflows and certain kinds of injection attacks. You can find it at the Hardened PHP project web-page. It has a number of default items it blocks, one of which is the number of variables it allows to be posted and received.
You can configure it to either block potential attacks a and to log the results in unix syslog. you can also configure it to allow issues to occur and to only log events too.
You can control the Suhosin default values in your php.ini file.
Some php applications use an enormous amount of post variables so the default value (200) is probably too low. As I have explained to my co-worker, getting rid of the plug-in because your script uses too many post variables is probably not the best solution.
The solution in the that event is to modify the maximum request and post vars.
You can also tell suhosin to in the event of encountering a possible attack to run a different script or a http redirect instead. Like perhaps something like this:
(php.ini entry)
[suhosin]
suhosin.filter.action=[302,]http://www.youtube.com/watch?v=Yu_moia-oVI
As you can see this has a number of interesting possibilities.
If you are interested in PHP and AMP (oamp,lamp ...etc) technologies See also:
The hardened PHP project:
http://www.hardened-php.net/suhosin/
Ax0n's OAMP (Apache, Mysql, PHP on OpenBSD) Article:
http://www.h-i-r.net/2008/12/sysadmin-sunday-amp-on-openbsd-44.html
Asmodian X's Name based hosting mini-howto:
http://www.h-i-r.net/2008/10/sysadmin-sunday-apache-name-based.html
The PHP main website:
http://www.php.net/
The Apache webserver website:
http://httpd.apache.org/
Labels: php, script, white list, workbench
2008-12-21
Sysadmin Sunday: AMP on OpenBSD 4.4
FYI - There's now a page that covers OAMP for all recent versions of OpenBSD.
PKG_PATH=ftp://ftp.openbsd.org/pub/OpenBSD/4.4/packages/i386/My user-level account is also in the wheel group, and the following line was uncommented from /etc/sudoers:
export PKG_PATH
%wheel ALL=(ALL) SETENV: ALLThat means anyone in wheel can run anything with sudo as any other user (root by default)
-bash-3.2$ sudo pkg_add php5-mysql mysql-server--- php5-core-5.2.6 -------------------
To enable the php5 module please create a symbolic
link from /var/www/conf/modules.sample/php5.conf
to /var/www/conf/modules/php5.conf.
ln -s /var/www/conf/modules.sample/php5.conf \
/var/www/conf/modules
The recommended php configuration has been installed
to /var/www/conf/php.ini.
Don't forget that the default OpenBSD httpd is chrooted
into /var/www by default, so you may need to create support
directories such as /var/www/tmp for PHP to work correctly.
--- php5-mysql-5.2.6 -------------------
You can enable this module by creating a symbolic
link from /var/www/conf/php5.sample/mysql.ini to
/var/www/conf/php5/mysql.ini.
ln -fs /var/www/conf/php5.sample/mysql.ini \
/var/www/conf/php5/mysql.ini
sudo cp /var/www/conf/modules.sample/php5.conf \/var/www/conf/modules/
sudo cp /var/www/conf/php5.sample/mysql.ini \/var/www/conf/php5/
sudo /usr/local/bin/mysql_install_dbsudo /usr/local/share/mysql/mysql.server startsudo /usr/local/bin/mysqladmin \-u root password 'your-password'
sudo vi /etc/rc.conf(find httpd_flags once editing the file)# use -u to disable chroot, see httpd(8)
httpd_flags=""-or-httpd_flags="-u"
You can launch apache easily from the command line now by executing httpd, so you don't need to reboot. Use -u if you specified it in /etc/rc.conf.
sudo httpd
sudo vi /etc/rc.local(add the following line to the end)/usr/local/share/mysql/mysql.server start
If it shows the menu, then MySQL is running and the password you configured is working.mysql_setpermission -u root
Password for user root to connect to MySQL: your-password
######################################################################
## Welcome to the permission setter 1.4 for MySQL.
## made by Luuk de Boer
######################################################################
What would you like to do:
1. Set password for an existing user.
2. Create a database + user privilege for that database
and host combination (user can only do SELECT)
3. Create/append user privilege for an existing database
and host combination (user can only do SELECT)
4. Create/append broader user privileges for an existing
database and host combination
(user can do SELECT,INSERT,UPDATE,DELETE)
5. Create/append quite extended user privileges for an
existing database and host combination (user can do
SELECT,INSERT,UPDATE,DELETE,CREATE,DROP,INDEX,
LOCK TABLES,CREATE TEMPORARY TABLES)
6. Create/append full privileges for an existing database
and host combination (user has FULL privilege)
7. Remove all privileges for for an existing database and
host combination.
(user will have all permission fields set to N)
0. exit this program
Make your choice [1,2,3,4,5,6,7,0]:
<?phpphpinfo();?>
Hit it with your web browser to make sure it loads. It should show you information about your PHP installation, including the MySQL module.

- Making a hard link to /var/run/mysql/mysql.sock within /var/www somewhere, and editing the php.ini file accordingly
- Disabling apache chroot by setting httpd_flags="-u"
- Checking the php, mysql, and apache error logs for more information about what went wrong