
No surprises, the existing instructions from OpenBSD 6.1 worked flawlessly for both the httpd and nginx web servers. I just made sure everything still works and updated some version numbers. Once again, I did all of the testing using OpenBSD's built-in vmm hypervisor on my personal laptop, and it did remind me of a few recent changes in vmm's network configuration that I had forgotten about.
Showing posts with label oamp. Show all posts
Showing posts with label oamp. Show all posts

2017-04-15
PHP/MySQL Walk-Throughs updated for OpenBSD 6.1
I've stopped maintaining the page for nginx because it hasn't received many views since I updated it about six months ago. I suspect that nginx on OpenBSD is not all that popular because the
httpd that ships with OpenBSD provides almost the same functionality as a
basic installation of nginx. The pages for httpd in base and Apache2 now cover PHP7 and both configurations appear to work really well.
PHP/MySQL on OpenBSD's relayd-based httpd
HiR's Secure OpenBSD/Apache/MySQL/PHP Guide
Feel free to comment on this post if you find any discrepancies or have suggestions. Comments are disabled on the walk-through pages.
(2017-04-23) Edited to add: I went ahead and re-worked the nginx guide, based on the httpd guide with new formatting.
PHP/MySQL with nginx on OpenBSD
2014-11-01
OpenBSD 5.6
OpenBSD 5.6 was released to the world today. The first things I noticed was a hint of better laptop support via an extra prompt from the installer, and the fact that they have finally ditched a functioning version of the apache fork in the base distribution, requiring users to rely on either nginx or the all-new relayd-based httpd, both of which are provided in OpenBSD 5.6. I've already updated the walk-through for OpenBSD/nginx/MySQL/PHP-FPM (ONMP Stack). As Apache is now out of the base distribution, I will transition the OAMP Stack page to cover Apache2 from the package repository. I plan on working out the details of getting MySQL/PHP working with the new httpd as well, but that could take a while.
2014-05-09
OpenBSD 5.5 PHP/MySQL walk-throughs are updated

At any rate, belhold, the updated guides:
2012-11-03
Introducing: nginx/MySQL/PHP stack on OpenBSD
While our walk-through for Apache/MySQL/PHP on OpenBSD is quite popular, the upgrade documentation for OpenBSD 5.2 is quoted thus:
nginx (see also nginx(8)) has been added to OpenBSD, ultimately to replace the Apache 1.3 derived httpd(8). For new installations, you are encouraged to utilize nginx rather than httpd, existing installations are encouraged to start planning replacing the stock httpd with nginx.
With Apache 1.3 being awfully long in the tooth, most of us saw something like this coming. With that, there's a new walk-through that covers the basic configuration of nginx, MySQL and php-fpm to create a working, secure and chroot-enabled web application environment in OpenBSD 5.2.
Introducing: The OpenBSD nginx/MySQL/PHP stack
2012-05-07
OpenBSD 5.1 Released: OAMP Updated
OpenBSD 5.1 was released last week, so the update is a bit overdue. HiR's Secure OpenBSD + AMP guide has been updated. OpenBSD 4.x is officially unsupported now, so we've dropped the 4.x parts from the guide and refined the rest. Since we've started covering the setup of an AMP stack on OpenBSD, the process has gotten considerably easier. OpenBSD is a completely viable and stable environment for running almost any PHP/MySQL web app, with a little extra consideration given to the chroot environment and Suhosin hardening patches while you're setting up your applications or programming new ones.
2011-11-12
OpenBSD 5.0: Apache, PHP and MySQL
The basic steps for taking a bare-bones install of OpenBSD and adding an AMP stack for web applications hadn't changed much in the past 2 years. Although 5.0 is not seen as a "major update", but simply a continuation of the normal development cycle, the OpenBSD team did a few things that make the installation a bit different this go around. I'll cover some of the recent changes to OpenBSD and its packages in this post, then you can dive right into the updated OpenBSD Chroot Apache, PHP, MySQL setup guide.
Initialization scripts: Starting with OpenBSD 4.9, the RC scripts became modular. This is similar to how NetBSD and FreeBSD have worked for many years. Individual daemons have startup scripts in /etc/rc.d, but rc.conf, rc.local and rc.conf.local still work the same, so it wouldn't surprise me if many OpenBSD users didn't even notice the change. It seems like OpenBSD 5.0 packages for most of the popular services (samba, cups, postgres, etc) are actually creating these startup scripts now. If a third-party application from packages installs a startup script in /etc/rc.d, you can add it to the pkg_scripts variable in /etc/rc.conf.local like so, and it'll magically start.
pkg_scripts="mysqld cups samba"
See the OpenBSD man page for rc.d for more details.
MySQL and chroot: I'm not sure why it didn't dawn on me before, but one really simple way around hard-linking MySQL's socket file into the chroot environment is to simply have your web applications connect to MySQL's TCP port on 127.0.0.1 (not localhost, because that means "use the socket file" in MySQL-ese) I think I'll be doing it this way in the future.
PHP: PHP 5.3 added a lot of features, such that PHP 5.2.x and PHP 5.3 might as well be different major version numbers when complex web applications are considered. OpenBSD 5.0 adds packages for PHP 5.3 for the first time, but PHP 5.2 is still available in the repository. For this reason, the PHP core and module packages are no longer prefixed by php5-, they're just php, php-mysql, etc. Since PHP 5.2 is still supported, the version numbers are used to distinguish them, like this:
$ sudo pkg_add php-mysql
Ambiguous: php-mysql could be php-mysql-5.2.17p3 php-mysql-5.3.6
Further, some configuration file locations have been changed. If you pay attention to the text after installing packages, this shouldn't make much difference. Hint: you can always re-read the post-install notes afterward by using pkg_info -M.
All in all, the recent changes to OpenBSD are welcome. Some of the things I outlined here are areas where OpenBSD had some catching up to do. They've managed to do a lot of proactive stuff in the realm of hardware support and (of course) security and encryption. This is still one of my favorite platforms to tinker with.
2010-10-18
OpenBSD 4.8 is almost here! Chroot Apache, MySQL and Suhosin Hardened PHP
I actually cheated a bit to make this article, if you can call busting my ass performing a "make package" for hundreds ports in OpenBSD-current and doing a bunch of Virtual Machine snapshot reversions "cheating." It was a major pain in the butt to do, but I won't have much free time when OpenBSD 4.8 actually ships, so here you have it.
My Chroot OAMP series of articles is pretty popular, especially since attacks against PHP web applications are on the rise and people are looking for ways to get a little extra security for their web hosting environments.
By default, OpenBSD ships with a specially patched and code-audited derivative of Apache web server. It has been engineered specifically to run in a chroot environment, which is to say that even if someone or something could make Apache run arbitrary code, it can only impact what's in the web directory. It can't readily harm or disrupt the rest of the system.
The version of PHP in OpenBSD's package repository has also been tweaked with the Suhosin Hardened-PHP patch, which can defend vulnerable PHP applications from certain kinds of malicious attacks.
A relatively current version of MySQL is also in the package repository. The configuration provided isn't too bad.
Getting the software installed is easy, but turning it into a functional and secure AMP environment can be a chore if you haven't done it before.
Preparation:
During the installation of OpenBSD, you are prompted to create a non-root user. This feature was introduced last year with OpenBSD 4.6, and is primarily to discourage the improper use of the root account. The user you create during installation will be automatically added to the wheel group, which grants permission to use the su command. I generally add the wheel group to sudo as well, by adding this line to /etc/sudoers (with the root user):
%wheel ALL=(ALL) SETENV: ALLIf you are currently logged in with your user-level account, you will need to log off and log in again in order to use sudo.Package management used to be one of the more annoying aspects of OpenBSD. In 2004, I even wrote my own scripts to wrangle the packages. They've gotten consistently better over the years, and with OpenBSD 4.8, they introduced yet another great feature: /etc/pkg.conf (manual page .) There are only a few options available for this file right now, but it allows you to set global options for the package tools instead of setting up and relying on the PKG_PATH environment variable. If you perform an FTP install, the installer should automatically add the FTP mirror you used to this file. If you installed from CD but would like to use an ftp mirror for pkg_add, you need to add an "installpath" line to /etc/pkg.conf, which may not exist yet.
installpath=ftp://ftp5.usa.openbsd.org/pub/OpenBSD/4.8/packages/i386Of course, you can pick whichever mirror you like. The OpenBSD project maintainers frown upon pointing direct downloads at the main ftp site. You can easily add local package repositories to this path.
Installing Packages
Installing php5-mysql and mysql-server will fetch all of the dependencies for OAMP. This process may take a while depending on your connection speed. There are several dependencies that will be installed, including php5-core and some perl modules.
sudo pkg_add php5-mysql mysql-serverNext, copy the PHP + MySQL sample files into placesudo cp /var/www/conf/modules.sample/php5.conf \Run the script to get the default MySQL database installed, start MySQL and set a MySQL root password./var/www/conf/modules/
sudo cp /var/www/conf/php5.sample/mysql.ini \/var/www/conf/php5/
At this point, both MySQL and PHP are installed and set up with a default configuration that will probably work fine for most applications.sudo /usr/local/bin/mysql_install_dbsudo /usr/local/share/mysql/mysql.server startsudo /usr/local/bin/mysqladmin \-u root password 'your-password'
Chroot Setup
In this version of OpenBSD, a chroot /tmp directory already exists with the proper permissions in /var/www, which simplifies setup of the chroot environment. All we're left to do is to reproduce the directory structure for the MySQL socket under /var/www.
sudo mkdir -p /var/www/var/run/mysql # -p creates subdirs as neededStart Apache and MySQL at bootSet apache to start on boot by editing /etc/rc.conf. Find the httpd_flags line in the file, change NO to "" -- literally, two double quotes as shown below.
sudo vi /etc/rc.conf
Then, make sure that MySQL starts at boot and that the real mysql.sock file gets hard linked into the new directory by editing /etc/rc.local. I also added a line to remove the old hard link before starting MySQL. The end of my /etc/rc.local looks like this:# use -u to disable chroot, see httpd(8)httpd_flags=""
rm /var/www/var/run/mysql/mysql.sockAfter getting all of the services set up to start automatically, I usually reboot to make sure everything starts up as expected.
/usr/local/share/mysql/mysql.server starr
sleep 5
ln /var/run/mysql/mysql.sock /var/www/var/run/mysql/mysql.sock
sudo rebootTesting
Once the system comes back online, the most basic test of Apache and PHP is to create a phpinfo script. This can be done with one line of shell-fu, which will launch "tee" with root permissions to write the phpinfo.php file.
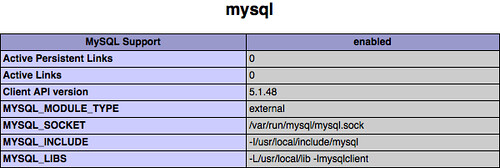
echo "<?php phpinfo(); ?>" | sudo tee /var/www/htdocs/phpinfo.phpThen, navigate to http://your.openbsd.ip.address/phpinfo.php in your web browser. It should load a nice-looking document containing details about PHP's configuration. In particular, check for MySQL.
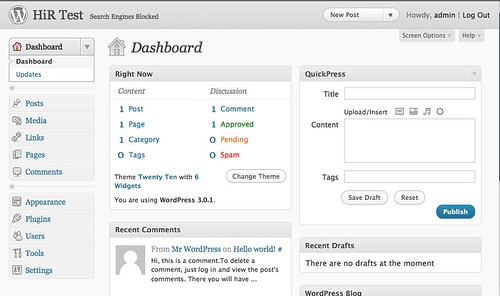
To wrap up, I performed the usual "5 minute install" of Wordpress 3.0.1 (current as of writing) to see what happens. The end result was a totally painless and fully functional setup that's ready to go.
2010-05-17
OpenBSD 4.7 + Chrooted Apache, MySQL & Suhosin PHP
 FYI - There's now a page that covers OAMP for all recent versions of OpenBSD. My OAMP series is a popular one. Although OpenBSD 4.7 doesn't come out for 2 more days, the media has already shipped to those who pre-ordered. And, as I mentioned previously, you'll want to get crack-a-lacking on those patches. As of the time of writing, there are already 4 patches to install for OpenBSD 4.7, which affect all architectures.
I'll spare you the verbosity. The installation procedure for getting OpenBSD, Chrooted Apache, MySQL and Suhosin-hardened PHP all working together hasn't changed one bit in OpenBSD 4.7. You can follow my instructions verbatim from the OAMP 4.6 Walk-Through, with one minor difference: make sure you change "4.6" to "4.7" when defining PKG_PATH in your .profile.
I was able to go from an empty virtual machine to a fully-functioning, chrooted install of WordPress in under 30 minutes just by following the instructions (and, of course, pointing the PKG_PATH to the packages on the media, not FTP, since the 4.7 branch hasn't hit the Internet yet)
Now that blogger has the ability to store "pages", I may eventually convert this article series to a living document. There are also some lazy shortcuts I take that kind of go against traditional OpenBSD methods (directly launching stuff from rc.local, editing rc.conf instead of making changes in rc.conf.local, etc) - I may get around to de-cruft-ifying this how-to at the same time. Otherwise: Enjoy!
2009-10-28
OAMP: OpenBSD 4.6 + Chroot Apache + MySQL + PHP
Introduction
I'm combining the OAMP howto with chroot from the start this time because it's really the proper and secure thing to do. You can read more about how chroot works in my last article about it, but the premise is that chrooting Apache limits the amount of damage that can be caused by vulnerabilities in web applications. Keep in mind that we'll be accessing MySQL from within the chroot in this article, so all content within MySQL is potentially at risk if you're serving up SQLi-vulnerable content. The best things the average sysadmin can do to protect the server is to keep webapps and system patches up-to-date, and to perform periodic database dumps and system-wide backups.
I will walk through the commands here without showing the output they generate. You can reference my OAMP walk-through from OpenBSD 4.4 if you want to see example output, which should look similar for OpenBSD 4.6. The output shouldn't matter much, because I'll walk you through everything here.
Preparation
To start off, I make sure that a user-level admin account has access to run anything as root from sudo. Note: all the administrative commands in this post begin with "sudo" for a reason. To do this, I add my admin account to the wheel group. You can do this during the adduser process or with usermod, but if you created a non-root admin user during the OpenBSD 4.6 installation process, that user will be in the wheel group by default. All you need to do is add a sudo rule for the wheel group. It's commented out in /etc/sudoers.
$ su -
Password:
# visudo
... or use whatever editor you want on /etc/sudoers. Not recommended.
Find the line that grants access to the wheel group, and uncomment it. It's about 35-40 lines down in the default configuration. Optionally, there's a NOPASSWD version of the same, a few lines down. I don't recommend using this option on a production server, but it may make system management more friendly on your development servers and workstations.
%wheel ALL=(ALL) SETENV: ALL
-- or --
%wheel ALL=(ALL) NOPASSWD: SETENV: ALL
I also set up the path for pkg_add by adding these lines to my user-level account's .profile, then logging out and back in to reload the profile. I usually use an OpenBSD mirror, like ftp5.usa.openbsd.org instead of the main FTP site. You can also use any of the http mirrors in this path.
vi .profile
PKG_PATH=ftp://ftp5.usa.openbsd.org/pub/OpenBSD/4.6/packages/i386/
export PKG_PATH
Installing PackagesInstalling php5-mysql and mysql-server will fetch all of the dependencies for OAMP. This particular version of PHP comes pre-compiled with the suhosin hardened PHP patches in place, which is a nice touch! This process may take a while depending on your connection speed. There are eight or nine packages in total, including php5-core and some perl modules that MySQL depends on for its management tools.
sudo pkg_add php5-mysql mysql-serverNext, copy the PHP + MySQL sample files into placesudo cp /var/www/conf/modules.sample/php5.conf \Run the script to get the default MySQL database installed, start MySQL and set a MySQL root password./var/www/conf/modules/
sudo cp /var/www/conf/php5.sample/mysql.ini \/var/www/conf/php5/
At this point, both MySQL and PHP are installed and set up with a default configuration that will probably work fine for most applications.sudo /usr/local/bin/mysql_install_dbsudo /usr/local/share/mysql/mysql.server startsudo /usr/local/bin/mysqladmin \-u root password 'your-password'
Chroot Setup
Most AMP packages only need somewhere to store Session information and a way to get to the MySQL socket. Since the real /tmp contains information that is not needed for Apache, we'll just create a new tmp directory specifically for Apache within /var/www and make it world-writable with the "sticky bit" set (exactly like the real /tmp)
sudo mkdir /var/www/tmpNext, reproduce the directory structure for the MySQL socket under /var/www.
sudo chmod 1777 /var/www/tmp
sudo mkdir -p /var/www/var/run/mysql # -p creates subdirs as neededStart Apache and MySQL at bootSet apache to start on boot by editing /etc/rc.conf. Find the httpd_flags line in the file, change NO to "" -- literally, two double quotes as shown below.
sudo vi /etc/rc.conf
Then, make sure that MySQL starts at boot and that the real mysql.sock file gets hard linked into the new directory by editing /etc/rc.local. I also added a line to remove the old hard link before starting MySQL. The end of my /etc/rc.local looks like this:# use -u to disable chroot, see httpd(8)httpd_flags=""-or-httpd_flags="-u" #disables chroot. You can if you want.
rm /var/www/var/run/mysql/mysql.sock
/usr/local/share/mysql/mysql.server start
ln /var/run/mysql/mysql.sock /var/www/var/run/mysql/mysql.sock
After getting all of the services set up to start automatically, I usually reboot to make sure everything starts up as expected.
sudo reboot
Testing
Once the system comes back online, the most basic test of Apache and PHP is to create a phpinfo script. This can be done with one line of shell-fu, which will launch "tee" with root permissions to write the phpinfo.php file.
echo "<?php phpinfo(); ?>" | sudo tee /var/www/htdocs/phpinfo.php
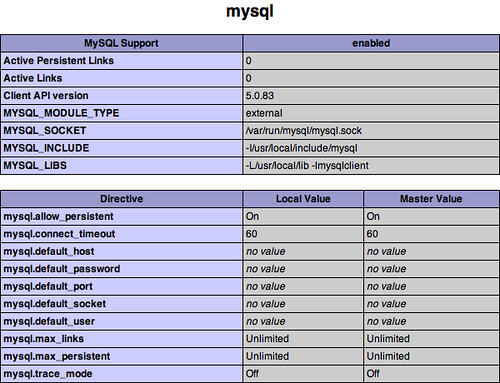
Then, navigate to http://your.openbsd.ip.address/phpinfo.php in your web browser. It should load a nice-looking document containing details about PHP's configuration. In particular, check for MySQL.
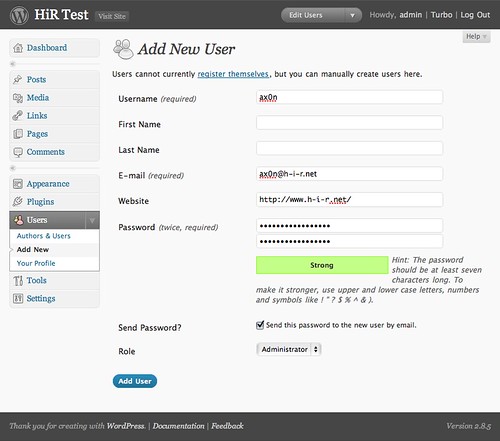
To really put our fresh chrooted OAMP installation through its paces, I downloaded the latest version of Wordpress, then followed the instructions using "the famous 5-minute install", which is way beyond the scope of this article. It's as simple as creating a database, setting up a privileged user for that database, editing a configuration file and copying wordpress into /var/www/htdocs (or a subdirectory) before accessing the control panel to finish up.
The wordpress install worked without changing anything from the instructions, and it's all running under chroot without any problems!
If you find that things are not working well with a particular AMP application, check file permissions, and copy or create hard links to files or directories that are needed. Example: sometimes you need a fake /etc/password file, some tools from /usr/bin or a /dev structure to be replicated within the chroot environment. Add these only as needed.
2009-10-27
Installing OpenBSD 4.6, Virtual machine snapshots
OpenBSD's install process changed for the first time in a very long time with the release of 4.6.
For the most part, I feel like the changes are for the better. The install script asks fewer questions, and one can almost accept all the default options without worrying about much of anything. I've already installed it on a few of my systems, but in preparation for my upcoming article on getting OpenBSD, Apache, MySQL and PHP playing together nicely in a chroot environment, I decided to install it in VirtualBox.
Here you can see a new feature towards the top of the screen shot. OpenBSD now asks if you wish to create an initial non-root user. This user will be automatically placed in the wheel group, which has certain administrative abilities in OpenBSD.
At the bottom of this screen shot you can see the partitioning setup. This is similar to the old manual disk partitioning from pre-4.6 installs. It's worth reading up on the OpenBSD installation FAQ, which has a detailed section on setting up disks. Notice that I'm doing a fresh install over OpenBSD 4.5, so the partition table is laid out in OpenBSD's "Whole Disk" mode already. Your partition table may look different.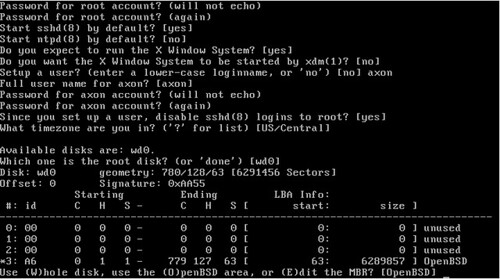
After that, you get the disklabel, which now has an "auto" option by default for setting up the slices, similar to FreeBSD. I just pressed enter and watched as the filesystems were created.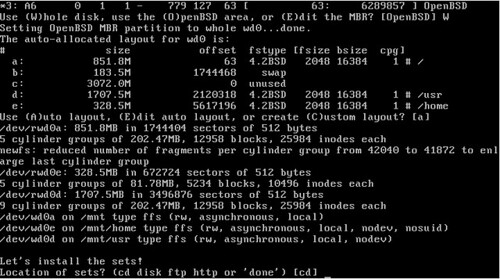
The installation set selection changed aesthetically, but it's the same as before, there's just not one item per line anymore.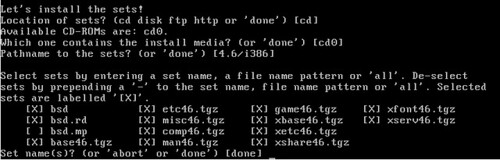
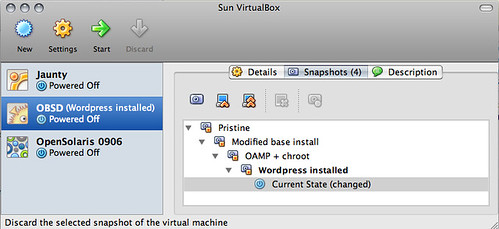
When I test things out, I like the ability to use snapshots in a virtual machine environment. This isn't a unique feature to VirtualBox. I know VMWare can do it as well. I shut down the VM and made a pristine snapshot right after installation, then I started the VM, logged in, got some things configured the way I want (sudo, bash, and PKG_PATH) and made another snapshot after shutting down one more time.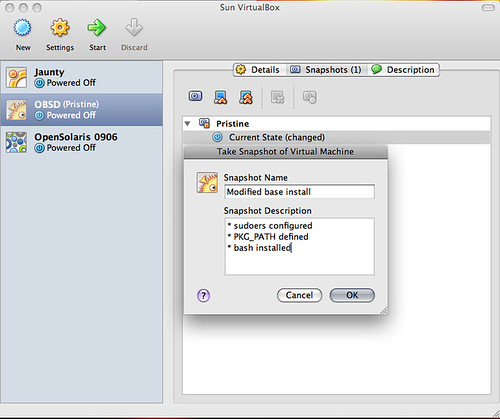
In preparing another OAMP article, snapshots are nice because as I try to get OAMP working, I usually run into snags. Snapshots enable the VM to go back to a previous state and start over from a specific point in time without doing a fresh installation.
Once I think I have the installation procedure down solid, I can revert to the base install one more time and make sure my instructions work. Obviously, virtual machine snapshots have many great uses for both desktop and server instances alike. This is a look into one way I utilize them. For servers, this is a life-saver for backing out of a change gone bad, but it's no substitute for testing changes properly before deploying them to production. Think of snapshots as bookmarks to a virtual machine's past:
One of our readers has already tried the instructions for OpenBSD 4.5 on his new OpenBSD 4.6 installation with some problems. I'll see if I can reproduce the issue and come up with instructions to work through them. Look for an OAMP Chroot article for OpenBSD 4.6 coming soon!
2009-05-03
Sysadmin Sunday: Updated OAMP: OpenBSD 4.5 Apache MySQL PHP
FYI - There's now a page that covers OAMP for all recent versions of OpenBSD.
It turns out that, just like with OpenBSD 4.4, It's a cinch to get a rock-solid web application hosting environment up and running with OpenBSD 4.5. In fact, the only thing that really changed is the version numbers. Just remember to either run these as root, or preferably add your user account to sudoers.
I'll keep this quick and easy. You can just reference my OAMP walk-through from 4.4 if you want to see some more output, but otherwise you can simply run these commands:
# sets up the path for pkg_add (I usually add these lines to my .profile)
If you run httpd in its default chroot mode, it can be difficult to get some AMP packages running properly due to the location of the MySQL socket and the php configuration. If you run httpd -u, most PHP5-compatible packages should just work with minimal effort.
I have never actually installed Wordpress before, and I got it up and running on OAMP (without chroot) in about 3 minutes by following the Wordpress instructions.


Next Sysadmin Sunday, I'll hopefully cover the things you should be prepared to do in order to run AMP packages in OpenBSD's default chroot environment. I've done it before (whilst working at a startup in 2006) but I'm a bit rusty.
I'll keep this quick and easy. You can just reference my OAMP walk-through from 4.4 if you want to see some more output, but otherwise you can simply run these commands:
# sets up the path for pkg_add (I usually add these lines to my .profile)
PKG_PATH=ftp://ftp.openbsd.org/pub/OpenBSD/4.5/packages/i386/
export PKG_PATH
# Installing these two packages will fetch all the dependenciessudo pkg_add php5-mysql mysql-server# Copy the sample files into placesudo cp /var/www/conf/modules.sample/php5.conf \# Get MySQL started and the default database installed/var/www/conf/modules/
sudo cp /var/www/conf/php5.sample/mysql.ini \/var/www/conf/php5/
# Set apache to start on boot by editing /etc/rc.confsudo /usr/local/bin/mysql_install_dbsudo /usr/local/share/mysql/mysql.server startsudo /usr/local/bin/mysqladmin \-u root password 'your-password'
# Launch apache (unless you plan on rebooting when this is done)sudo vi /etc/rc.conf#(find httpd_flags once editing the file)# use -u to disable chroot, see httpd(8)
httpd_flags=""-or-httpd_flags="-u"
sudo httpd-or-sudo httpd -u# Set MySQL to start at bootThat's really all there is to it!sudo vi /etc/rc.local(add the following line to the end)/usr/local/share/mysql/mysql.server start
If you run httpd in its default chroot mode, it can be difficult to get some AMP packages running properly due to the location of the MySQL socket and the php configuration. If you run httpd -u, most PHP5-compatible packages should just work with minimal effort.
I have never actually installed Wordpress before, and I got it up and running on OAMP (without chroot) in about 3 minutes by following the Wordpress instructions.


Next Sysadmin Sunday, I'll hopefully cover the things you should be prepared to do in order to run AMP packages in OpenBSD's default chroot environment. I've done it before (whilst working at a startup in 2006) but I'm a bit rusty.
2008-12-21
Sysadmin Sunday: AMP on OpenBSD 4.4
FYI - There's now a page that covers OAMP for all recent versions of OpenBSD.
At the beginning of 2008, I posted how to get Apache, PHP, and MySQL running on OpenBSD 4.2. This is commonly known as LAMP when running under Linux. I call this OAMP.
You can launch apache easily from the command line now by executing httpd, so you don't need to reboot. Use -u if you specified it in /etc/rc.conf.
Hit it with your web browser to make sure it loads. It should show you information about your PHP installation, including the MySQL module.

I decided to AMP my OpenBSD 4.4 rig, and followed those instructions. No surprise, things have changed a little bit.
Before installing packages
First and foremost, make sure you can easily install packages. In this case, I've added the FTP repository to the PKG_PATH environment variable, then I've made sure my user-level account has access to sudo.
OpenBSD's package system has finally become a little less flaky about remote packages and dependencies, so I finally added this to my user-level account's .profile:
PKG_PATH=ftp://ftp.openbsd.org/pub/OpenBSD/4.4/packages/i386/My user-level account is also in the wheel group, and the following line was uncommented from /etc/sudoers:
export PKG_PATH
%wheel ALL=(ALL) SETENV: ALLThat means anyone in wheel can run anything with sudo as any other user (root by default)
Installing packages
Obviously, you've got OpenBSD 4.4 installed and patched. If not, you'd better get crack-a-lacking, homeslice! OpenBSD comes with Apache, so you're basically halfway there by installing OpenBSD.
The following command will install php5-mysql and mysql-server (obviously)
That will grab all the dependencies in one swoop, including the mysql-client package and php5-core. I'll snip the output to only display the relevant stuff, and address that afterwards-bash-3.2$ sudo pkg_add php5-mysql mysql-server--- php5-core-5.2.6 -------------------
To enable the php5 module please create a symbolic
link from /var/www/conf/modules.sample/php5.conf
to /var/www/conf/modules/php5.conf.
ln -s /var/www/conf/modules.sample/php5.conf \
/var/www/conf/modules
The recommended php configuration has been installed
to /var/www/conf/php.ini.
Don't forget that the default OpenBSD httpd is chrooted
into /var/www by default, so you may need to create support
directories such as /var/www/tmp for PHP to work correctly.
--- php5-mysql-5.2.6 -------------------
You can enable this module by creating a symbolic
link from /var/www/conf/php5.sample/mysql.ini to
/var/www/conf/php5/mysql.ini.
ln -fs /var/www/conf/php5.sample/mysql.ini \
/var/www/conf/php5/mysql.ini
Configuring Packages
As shown above, there's some work to do in order to make PHP work with Apache and make the PHP module load the MySQL client library.
I'm not a huge fan of symbolic links to sample files. I opted to copy them.
sudo cp /var/www/conf/modules.sample/php5.conf \/var/www/conf/modules/
sudo cp /var/www/conf/php5.sample/mysql.ini \/var/www/conf/php5/
Install the default database and start MySQL, then assign a password for the MySQL root user with the following commands (the output doesn't really matter)
sudo /usr/local/bin/mysql_install_dbsudo /usr/local/share/mysql/mysql.server startsudo /usr/local/bin/mysqladmin \-u root password 'your-password'
Now, we want to make sure that both Apache and MySQL start automatically.
Find the "httpd_flags" line in /etc/rc.conf and set it to literally two quotes: "" or, if you want to disable chroot (not recommended, but can make OAMP life much easier for you when you go to install webapps) set it to "-u":
sudo vi /etc/rc.conf(find httpd_flags once editing the file)# use -u to disable chroot, see httpd(8)
httpd_flags=""-or-httpd_flags="-u"
You can launch apache easily from the command line now by executing httpd, so you don't need to reboot. Use -u if you specified it in /etc/rc.conf.
sudo httpd
This is kind of a cheap and non-official way to do make MySQL start, but it works just fine and it's how I always do it. You're supposed to make an rc function and all that so you can enable/disable it in /etc/rc.conf. Bah. Add the following line to the end of /etc/rc.local.
sudo vi /etc/rc.local(add the following line to the end)/usr/local/share/mysql/mysql.server start
At this point, you have OpenBSD set up to start Apache and MySQL at boot, and both should be running. Additionally, the PHP module should be loaded. To test MySQL, use mysql_setpermission, a perl script that lets you manage and create databases and users.
If it shows the menu, then MySQL is running and the password you configured is working.mysql_setpermission -u root
Password for user root to connect to MySQL: your-password
######################################################################
## Welcome to the permission setter 1.4 for MySQL.
## made by Luuk de Boer
######################################################################
What would you like to do:
1. Set password for an existing user.
2. Create a database + user privilege for that database
and host combination (user can only do SELECT)
3. Create/append user privilege for an existing database
and host combination (user can only do SELECT)
4. Create/append broader user privileges for an existing
database and host combination
(user can do SELECT,INSERT,UPDATE,DELETE)
5. Create/append quite extended user privileges for an
existing database and host combination (user can do
SELECT,INSERT,UPDATE,DELETE,CREATE,DROP,INDEX,
LOCK TABLES,CREATE TEMPORARY TABLES)
6. Create/append full privileges for an existing database
and host combination (user has FULL privilege)
7. Remove all privileges for for an existing database and
host combination.
(user will have all permission fields set to N)
0. exit this program
Make your choice [1,2,3,4,5,6,7,0]:
Test PHP and Apache by creating a phpinfo.php file in /var/www/htdocs/phpinfo.php:
<?phpphpinfo();?>
Hit it with your web browser to make sure it loads. It should show you information about your PHP installation, including the MySQL module.

If you experience problems installing *AMP-based web apps, try:
- Making a hard link to /var/run/mysql/mysql.sock within /var/www somewhere, and editing the php.ini file accordingly
- Disabling apache chroot by setting httpd_flags="-u"
- Checking the php, mysql, and apache error logs for more information about what went wrong
2008-01-19
Sysadmin Sunday: OpenBSD 4.2, Apache, MySQL, PHP (OAMP?)
Editor's note: I know, I know. This is SATURDAY! But I'm putting this out there for a good reason. Today is also KC PHP User's Group's first meeting of 2008, and what better way to kick off the KCPUG new year than with some fresh AMP-Stack Content. So, here we go.
It used to be that some stuff had to be compiled by hand to make everything work just right, but the package/port guys finally nailed it. With the help of obsd_pkgscripts, OAMP is a breeze. The benefits of running your AMP-driven website atop OpenBSD are many, not the least of which are the facts that it's a minimalistic, secure, and high-performance platform out of the box.
OpenBSD already ships with Apache. It's a patched and tweaked version of Apache, but it's Apache all the same. You're already halfway to OAMP land with OpenBSD and Apache installed out of the box.
First, install the MySQL Server. I obviously chose to use my pkg_get.sh tool for this, but it's not needed.
$ pkg_get.sh mysql-server
Attempting to fetch/install package...
mysql-client-5.0.45: complete
p5-DBD-mysql-3.0008:p5-Net-Daemon-0.39: complete
p5-DBD-mysql-3.0008:p5-PlRPC-0.2018p0: complete
p5-DBD-mysql-3.0008:p5-DBI-1.53: complete
p5-DBD-mysql-3.0008: complete
mysql-server-5.0.45: complete
--- mysql-server-5.0.45 -------------------
You can find detailed instructions on how to install a database
in /usr/local/share/doc/mysql/README.OpenBSD.
Next, that README contains some useful information for more advanced installations and performance, but summarized, follow these instructions. I use sudo, and rarely use the root account. I recommend doing the same.
Create the DB:
-bash-3.2$ sudo /usr/local/bin/mysql_install_dbStart MySQL:
-bash-3.2$ sudo /usr/local/share/mysql/mysql.server startTo make MySQL Start up at boot, add the above mysql startup line to /etc/rc.local without the "sudo" at the beginning (optional but highly recommended). There is a "theoretically correct" start-up snippit on the documentation, but I've found this works just as well.
Set a password for mysql's root user (choose a better one than this):
-bash-3.2$ sudo /usr/local/bin/mysqladmin -u root password 'new-password'That's pretty much it as far as getting MySQL up and running is concerned. Now we just need to get PHP installed with the MySQL client library...
-bash-3.2$ sudo pkgscripts/pkg_get.sh php5-mysqlThen you have to follow the post-install instructions:
Attempting to fetch/install package...
php5-core-5.2.3: complete
php5-mysql-5.2.3: complete
--- php5-core-5.2.3 -------------------
To finish the install, enable the php5 module with:
/usr/local/sbin/phpxs -s
To enable parsing of PHP scripts, add the following to
/var/www/conf/httpd.conf:
AddType application/x-httpd-php .php
Copy the config file below into /var/www/conf/php.ini
/usr/local/share/examples/php5/php.ini-recommended
Don't forget that the default OpenBSD httpd is chrooted
into /var/www by default, so you may need to create support
directories such as /var/www/tmp for PHP to work correctly.
--- php5-mysql-5.2.3 -------------------
Enable this module in php.ini using the following command:
/usr/local/sbin/phpxs -a mysql
-bash-3.2$ sudo /usr/local/sbin/phpxs -sEdit /var/www/conf/httpd.conf and add the below line with the other AddTypes:
-bash-3.2$ sudo /usr/local/sbin/phpxs -a mysql
AddType application/x-httpd-php .php
I also recommend since we're going to be running PHP, adding index.php to the DirectoryIndex line:
DirectoryIndex index.html index.php
Save the httpd.conf file.
Now, copy the php.ini file over from the examples:
-bash-3.2-$ sudo cp \Now, make sure apache is set to start.
/usr/local/share/examples/php5/php.ini-recommended \
/var/www/conf/php.ini
If you plan on keeping all your web-related content content in /var/www, find the httpd_flags line in /etc/rc.conf and change it to httpd_flags=""
If you intend on giving users traditional ~username (public_html) directories, start apache without being chrooted. Chroot is more secure, but it's a royal pain if you want user home-directories on a vanilla OAMP box, and beyond the "quick and dirty OAMP" scope of this article. Find the httpd_flags line in /etc/rc.conf and change it to httpd_flags="-u" to disable chroot if you must.
The above change to httpd_flags will make apache auto-start upon reboot. You can manually start it with apachectl, though:
-bash-3.2$ sudo apachectl startMake a phpinfo example php file and move it into the web root.
/usr/sbin/apachectl start: httpd started
-bash-3.2$ echo "<?phpinfo();?>" > phpinfo.php
-bash-3.2$ sudo mv phpinfo.php /var/www/htdocs/Then test it out by pointing a browser to your new phpinfo.php file (example: http://10.23.45.67/phpinfo.php ) and you should see output from PHP. If you see a blank screen or just the phpinfo line, something went wrong. Re-check your steps.
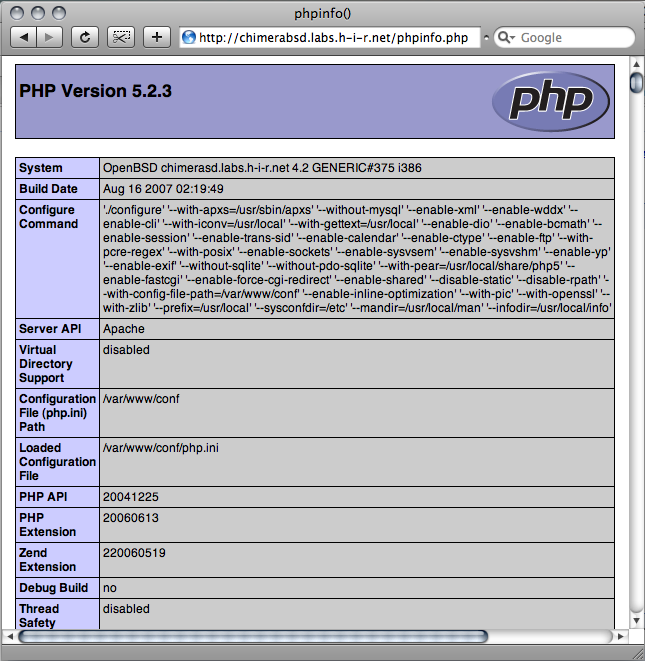
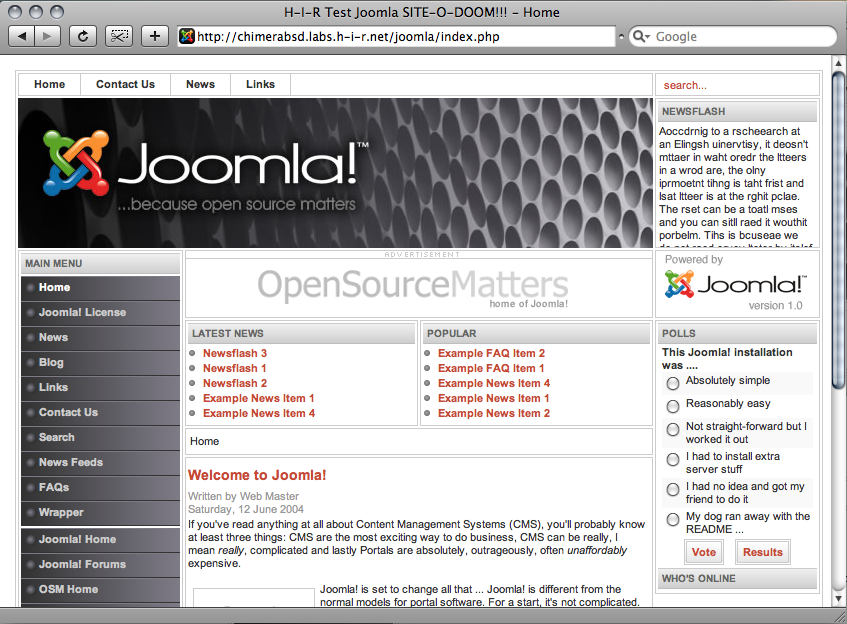
There you have it! As a test, I installed Joomla on this system (screen shot below). Joomla is a popular open-source CMS. I unpacked it into /var/www/htdocs/joomla and pointed my browser to it, following all of its instructions. This includes making a database, changing permissions on some of the Joomla files, and modifying some values in php.ini. The installation went off without any problems just like it would on any LAMP box. I'd imagine you'll see similar results with other *AMP packages such as phpMyAdmin, Xoops, and others.
Subscribe to:
Posts (Atom)

 Posts
Posts


