I actually cheated a bit to make this article, if you can call busting my ass performing a "make package" for hundreds ports in OpenBSD-current and doing a bunch of Virtual Machine snapshot reversions "cheating." It was a major pain in the butt to do, but I won't have much free time when OpenBSD 4.8 actually ships, so here you have it.
My Chroot OAMP series of articles is pretty popular, especially since attacks against PHP web applications are on the rise and people are looking for ways to get a little extra security for their web hosting environments.
By default, OpenBSD ships with a specially patched and code-audited derivative of Apache web server. It has been engineered specifically to run in a chroot environment, which is to say that even if someone or something could make Apache run arbitrary code, it can only impact what's in the web directory. It can't readily harm or disrupt the rest of the system.
The version of PHP in OpenBSD's package repository has also been tweaked with the Suhosin Hardened-PHP patch, which can defend vulnerable PHP applications from certain kinds of malicious attacks.
A relatively current version of MySQL is also in the package repository. The configuration provided isn't too bad.
Getting the software installed is easy, but turning it into a functional and secure AMP environment can be a chore if you haven't done it before.
Preparation:
During the installation of OpenBSD, you are prompted to create a non-root user. This feature was introduced last year with OpenBSD 4.6, and is primarily to discourage the improper use of the root account. The user you create during installation will be automatically added to the wheel group, which grants permission to use the su command. I generally add the wheel group to sudo as well, by adding this line to /etc/sudoers (with the root user):
%wheel ALL=(ALL) SETENV: ALLIf you are currently logged in with your user-level account, you will need to log off and log in again in order to use sudo.Package management used to be one of the more annoying aspects of OpenBSD. In 2004, I even wrote my own scripts to wrangle the packages. They've gotten consistently better over the years, and with OpenBSD 4.8, they introduced yet another great feature: /etc/pkg.conf (manual page .) There are only a few options available for this file right now, but it allows you to set global options for the package tools instead of setting up and relying on the PKG_PATH environment variable. If you perform an FTP install, the installer should automatically add the FTP mirror you used to this file. If you installed from CD but would like to use an ftp mirror for pkg_add, you need to add an "installpath" line to /etc/pkg.conf, which may not exist yet.
installpath=ftp://ftp5.usa.openbsd.org/pub/OpenBSD/4.8/packages/i386Of course, you can pick whichever mirror you like. The OpenBSD project maintainers frown upon pointing direct downloads at the main ftp site. You can easily add local package repositories to this path.
Installing Packages
Installing php5-mysql and mysql-server will fetch all of the dependencies for OAMP. This process may take a while depending on your connection speed. There are several dependencies that will be installed, including php5-core and some perl modules.
sudo pkg_add php5-mysql mysql-serverNext, copy the PHP + MySQL sample files into placesudo cp /var/www/conf/modules.sample/php5.conf \Run the script to get the default MySQL database installed, start MySQL and set a MySQL root password./var/www/conf/modules/
sudo cp /var/www/conf/php5.sample/mysql.ini \/var/www/conf/php5/
At this point, both MySQL and PHP are installed and set up with a default configuration that will probably work fine for most applications.sudo /usr/local/bin/mysql_install_dbsudo /usr/local/share/mysql/mysql.server startsudo /usr/local/bin/mysqladmin \-u root password 'your-password'
Chroot Setup
In this version of OpenBSD, a chroot /tmp directory already exists with the proper permissions in /var/www, which simplifies setup of the chroot environment. All we're left to do is to reproduce the directory structure for the MySQL socket under /var/www.
sudo mkdir -p /var/www/var/run/mysql # -p creates subdirs as neededStart Apache and MySQL at bootSet apache to start on boot by editing /etc/rc.conf. Find the httpd_flags line in the file, change NO to "" -- literally, two double quotes as shown below.
Then, make sure that MySQL starts at boot and that the real mysql.sock file gets hard linked into the new directory by editing /etc/rc.local. I also added a line to remove the old hard link before starting MySQL. The end of my /etc/rc.local looks like this:# use -u to disable chroot, see httpd(8)httpd_flags=""
rm /var/www/var/run/mysql/mysql.sockAfter getting all of the services set up to start automatically, I usually reboot to make sure everything starts up as expected.
/usr/local/share/mysql/mysql.server starr
sleep 5
ln /var/run/mysql/mysql.sock /var/www/var/run/mysql/mysql.sock
sudo rebootTesting
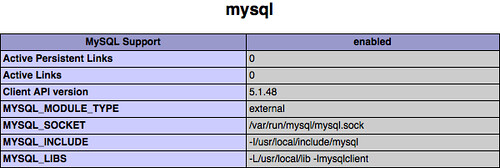
Once the system comes back online, the most basic test of Apache and PHP is to create a phpinfo script. This can be done with one line of shell-fu, which will launch "tee" with root permissions to write the phpinfo.php file.
echo "<?php phpinfo(); ?>" | sudo tee /var/www/htdocs/phpinfo.phpThen, navigate to http://your.openbsd.ip.address/phpinfo.php in your web browser. It should load a nice-looking document containing details about PHP's configuration. In particular, check for MySQL.

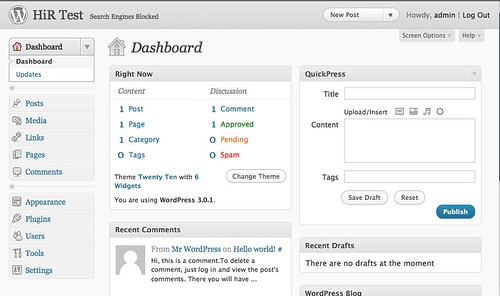
To wrap up, I performed the usual "5 minute install" of Wordpress 3.0.1 (current as of writing) to see what happens. The end result was a totally painless and fully functional setup that's ready to go.


