Often, one photograph might have regions that are overexposed and others that are too dark. Details are lost in these regions. Explained simply, HDR is about taking over-exposed photos to get the detail from the dark areas and under-exposed photos to capture textures in the brighter areas, then tone-mapping them together into one high-contrast composite image. Here's what you need to make tone-mapped HDR images:
- Tone-mapping software
- A set of photographs. Not just any photographs:
- All taken from exactly the same perspective.
- Varied exposure. It's recommended you have at least 3: one underexposed, one "normal" exposed, and one overexposed.
- The more photos, the better (to an extent)
- Take the highest quality photos possible. That means cranking up the resolution, using the lowest ISO you can get away with, and shooting in RAW if your camera can handle it.
I've written a little about The Canon Hacker's Development Kit, and even demonstrated CHDK at a 2600 meeting a while back ago.
CHDK is a firmware patch for Canon digital cameras. On inexpensive point-and-shoot Canons such as the PowerShot A530 my wife bought me for Christmas a while back ago, the firmware gets revamped, unleashing the ability to shoot in lossless RAW format, view live-updating histograms on-screen, run scripts, and even play games. You can obviously read more about it on the CHDK wiki, but Lifehacker had a decent write-up that you should check out.
Using CHDK to get a set of bracketed photos
While CHDK has a decent bracketing script on the wiki, you don't even need that. The default "Allbest" firmware has bracketing built-in. Read the CHDK installation instructions first. In fact, I recommend that if you haven't played with CHDK before, you bookmark this page, get CHDK installed, and play with it for a while first. Just to get used to it.
If you're local to Kansas City, I'd be more than happy to help you get up to speed. The script functionality is worth looking at. I'll cover it in a later article.
Pardon my "Screen shots" - I had to take them with a camera phone, so I hooked my Canon A530 up to the TV screen so that I could take photos of the menu without trying to focus on the tiny screen of my camera through the tiny screen on my phone.
Once CHDK is installed and started, fire up the Alt menu. Select:
Extra Photo Operations
--Bracketing in continuous mode
----TV bracketing value

Set that to at least 1/3 Ev as shown above (click for higher res). The bigger this number is, the fewer photos you'll need for a good range, but keep in mind that the more photos you get, the better. 2/3 or 1 Ev is a good compromise if you choose 5-7 photos. With 1 1/3 Ev or higher, you could try 3 or 5 photos.
To enable RAW (if supported)
RAW parameters
--Save RAW
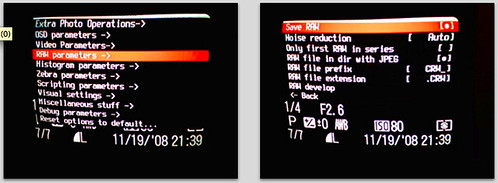
Select that, but keep in mind that it will take a few extra seconds per photo to save the image, and the RAW image will take up a lot of space on the memory card. For this demo, I won't be using RAW mode. If you choose to use RAW, they can be processed with UFRaw, a freeware tool that turns RAW photos into high-quality JPEG images.
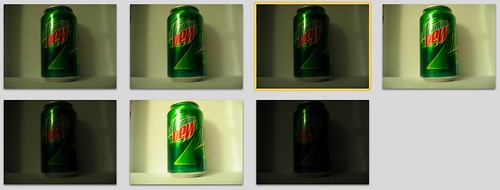
Bail out of the Alt menu and if it's not already in photo mode (instead of play/view mode), switch it over. In the Function menu, switch to Custom Timer drive mode. Hit the Menu button, and select the delay you want (a few seconds is a good idea, to avoid the jiggle as you hit the shutter) and the number of photos. I had 0 seconds delay in this photo, but you should probably go for 2 seconds or so. The camera should be on a tripod or stable surface.

Notice that in the last frame, CHDK has noted that bracketing is enabled for 2/3 Ev.
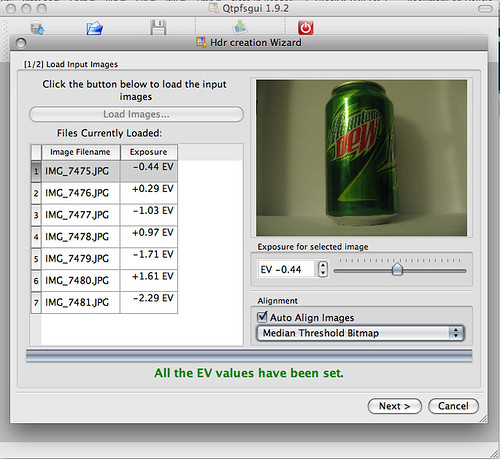
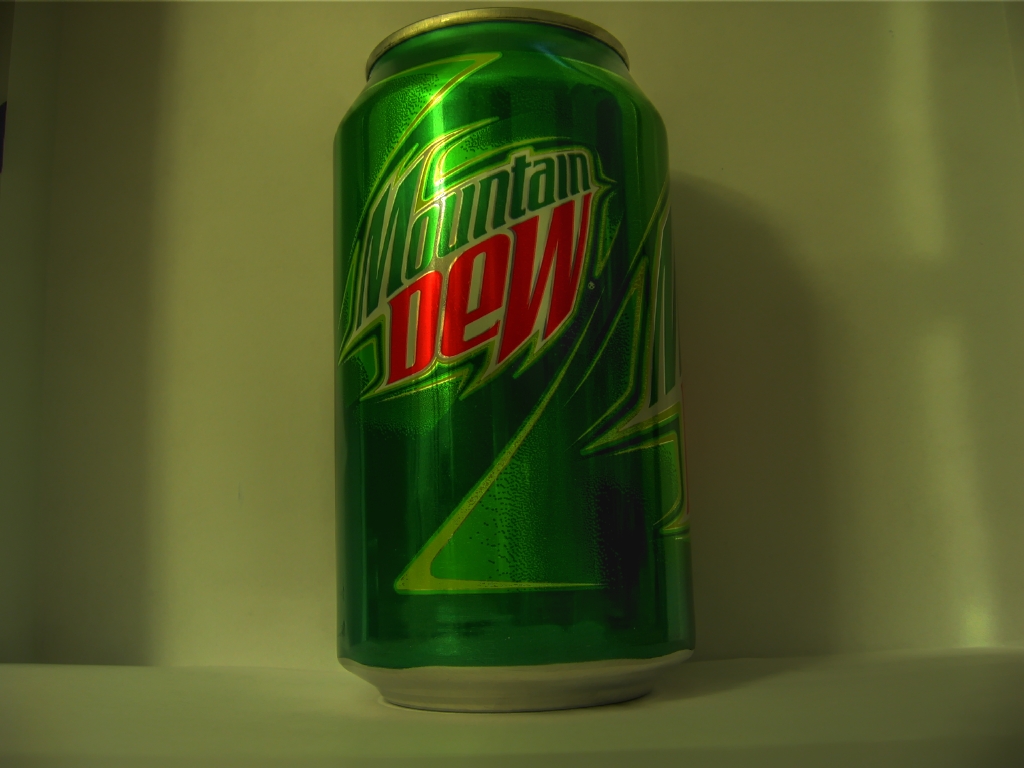
I then shot 7 bracketed photos of a Mt. Dew can. I used iPhoto to import these, but if you're an open-source zealot, I've had good luck using gtkam on FreeBSD and Linux with my Canon camera.
The hard part is done.
Tone-Mapping with qtpfsgui
A lot of the software for HDR is expensive, too. Photomatix is one of the more popular tools, and it's $99. qtpfsgui is an open-source tool based on QT. It runs on Linux, Windows and Mac OS X with little fanfare. While not as intuitive or easy to use as Photomatix, you still get more than you pay for with qtpfsgui. It's free, after all.
Load the images in, and select the option to automatically align them.
Click through the wizard and you'll have an HDR composite. Feel free to tinker with the values in the wizard to get the effects you want, but it's not needed if you just want to get started. In the resulting window, click "Tonemap the Hdr", then have fun exporting the images and playing with the values in the new window. Clicking "Apply" here will give you a composite with your settings. By default, it's a thumbnail size that renders quickly. You can see 4 different ones I did below with different settings.
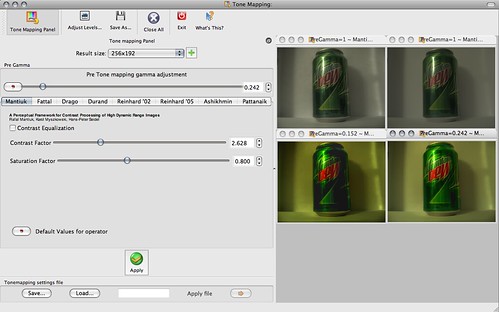
Once you've got a thumbnail that you really like, bump the Result size up to something usable and apply it again. Then use File - Save As to export the shiny, HDR image. Wow and amaze your friends.
Notice how the brightest and darkest areas retain a lot of detail. Click here for full size.

Here's a more extreme example of HDR that I took this morning:


