In the Geek 100, I said that every geek should be able to Terminate category 5 cable with RJ-45 plugs and make a crossover cable. While home networking isn't nearly as daunting as it used to be with ubiquitous WiFi routers, I stand by my assertion that no geek has a valid excuse for being unable to crimp some cables. It's a useful skill to have and it's quite easy to learn.
All you need (aside from some Twisted-Pair ethernet cable that has bad ends or no ends) are some crimp-on RJ-45 plugs, a knife and a crimping tool. The plugs are less than $1 each at Radio Shack and cents each in bulk, knives are commodity and crimping tools like the one shown (I've had it for probably 15 years) are available for $20 or less. If your crimping tool doesn't come with a wire cutter, a pair of diagonal pliers might be useful as well. There are some much nicer crimping tools available that get really expensive, but the entry-level ones are probably just fine for the geek who only needs to run wires occasionally.
Take your knife and cut the sheath off about 3/4" of the end of the cable. Inside, there are four pairs: Blue, Orange, Green and Brown. Due to carryover from ye-olde telecom days, the pairs are divided into "Tip" (color striped with white) and "Ring" (solid color). Many cable manufacturers put a nylon strand, string, or tuft inside the sheath as well. This makes stripping a long length of sheath easy, but you can safely cut away whatever of it is exposed without harm.
Arrange the wires in either of the two configurations shown below. We'll get to putting the RJ-45 plugs on in a moment. For the time being, focus on the order of the wires.
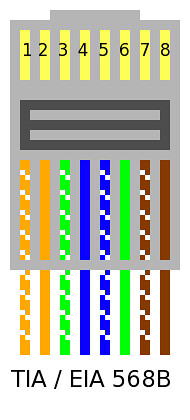
These days, 568-A is kind of "the standard" but when I was learning, the industry was hell-bent on using 568-B. Honestly, as long as you use the same 568 scheme on both ends of the cable and you crimp the RJ-45 plug properly, it really doesn't make a bit of difference at all. The wires are ordered this way to reduce crosstalk and interference, so I advise you stick with one of the two diagrams above.
I have the wires ordered 568-B below. The tips (white-striped wires) are hard to determine in the photo, and sometimes they'll be tricky to identify in real life. You may wish to do this under an eye loop or a workbench magnifying lens if your eyesight is sub-par.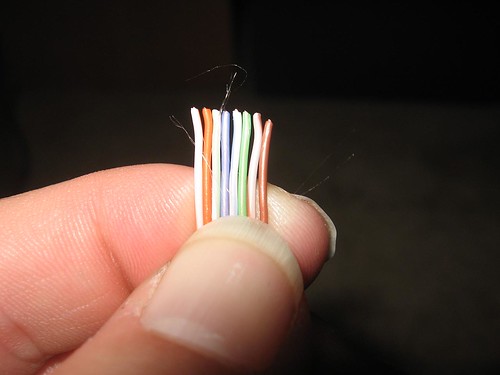
Use a wire cutter or a diagonal plier to cut the wires to the same length. It's important to keep the wires held flat and in the right order as shown above.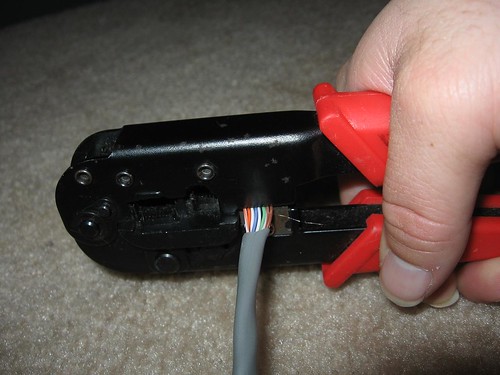
Slide the RJ-45 plug onto the cable end. Make sure the wires are still even and in the right order, and make sure that the sheath goes deep into the plug while still allowing the wires to "bottom out" in the plug. The sheath should be positioned so that the plastic tab that's crimped to hold the wires in place also holds the sheath. The wires should not be exposed out the bottom of the plug. (Thanks for the reminder, Ryan)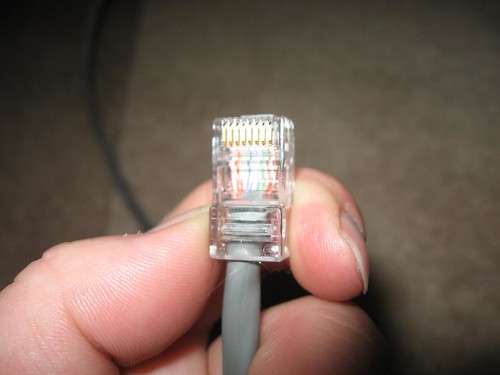
I stole this crimping "action shot" from the Loopback tester tutorial. Crimping the plug should be pretty straightforward. Make sure to give it a few good squeezes to ensure a good connection.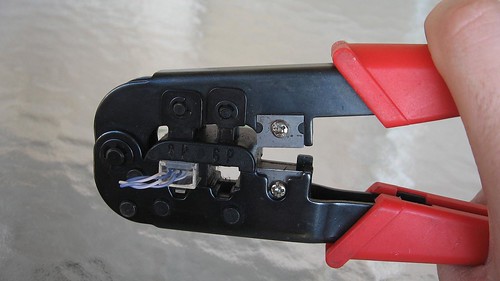
Make sure you wire both ends the same, and make sure the plugs are both installed facing the proper direction (with the metal pins pointed toward you and up). Here's another diagram I found on Wikipedia:
To make a crossover cable that can be used to connect two hubs/switches or two computers together (Without a hub or switch), simply wire one end as 568A and the other as 568B.
2008-11-06
Crimping Twisted-Pair Ethernet (and Crossover)
![]()
blog comments powered by Disqus
Subscribe to:
Post Comments (Atom)


