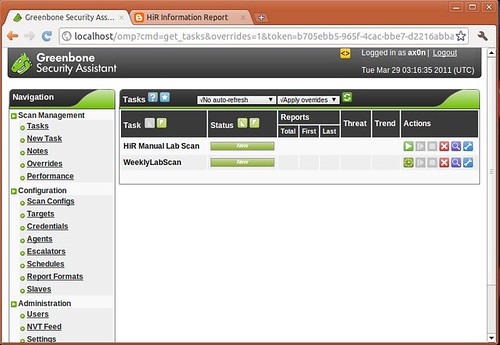
This is the second part of a series on OpenVAS, the open-source vulnerability scanner. In my last post, I walked you through compiling the various pieces of OpenVAS and getting it up and running. Now it's time to talk about the fundamentals. For this and future posts, we'll be using the web front-end to OpenVAS, called Greenbone Security Assistant, and we'll assume it's running on your local machine.
Why bother with OpenVAS, or vulnerability scanning in general?
Vulnerability scanners are not "hacking tools!" They're very noisy. They're ungainly. They lack finesse. They're riddled with false positives (vulnerabilities you try to manually verify and turn out to be non-existent) and false negatives (vulnerabilities that it doesn't know about or can't be easily detected and are thus missed). With so many weaknesses, why would you even bother?
Simply put, running frequent vulnerability scans on your network gives you a good baseline complete with the ability to notice a change from one week to the next. At the very least, you get a good feel for the "low-hanging fruit" -- the obvious and easy targets on your network. Additionally, many vulnerability scanners including OpenVAS have the ability to use a scanner agent installed on systems, and login credentials to inspect the local security of your servers, workstations and infrastructure. In this way, you can identify software that's out of date and security settings that are out of compliance. This can be a huge asset to your IT security stance once you have the scanner configured properly and running smoothly. That's easier said than done, unfortunately.
If you'll be using this system as a vulnerability scanner regularly, I recommend a few things:
Make sure the openvas services start at boot. I just added this stuff to /etc/rc.local on Ubuntu server:
echo "Starting OpenVAS Scanner Daemon..."/usr/local/sbin/openvassd && echo [ OK ]echo "Starting OpenVAS Manager Daemon..."/usr/local/sbin/openvasmd && echo [ OK ]echo "Starting OpenVAS Administrator Daemon..."/usr/local/sbin/openvasad && echo [ OK ]echo "Starting Greenbone Security Assistant Web Interface..."/usr/local/sbin/gsad --http-only && echo [ OK ]echo "Downloading NVT Updates..."/usr/local/sbin/openvas-nvt-sync && echo [ OK ]
Make sure you have nightly NVT Updates. I put this in root's crontab to run at 4:00AM each day:
0 4 * * * /usr/local/sbin/openvas-nvt-sync
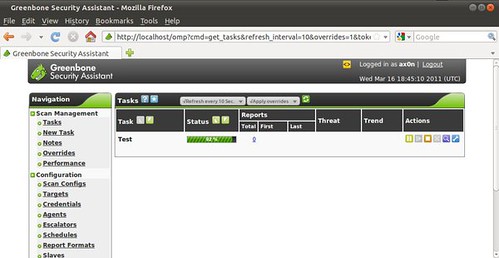
When you navigate to the web interface (usually http://localhost) and log in, you'll see the task screen, which I had shown you previously. Take note of the options on the left pane, as we'll be going through most of them.
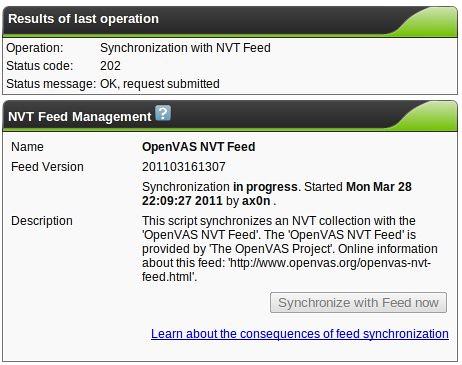
One of the first things you'll want to do if you didn't set up daily updates is to hit the "NVT Feed" link (not shown above) and update the NVT database.
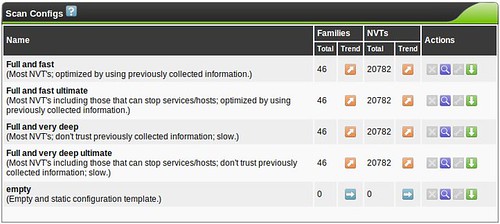
With that out of the way, our first stop is with scan configurations. OpenVAS comes with five template configurations, each of which might do something useful for you.
You don't need to create a custom scan config to get started with OpenVAS, but If you decide to create a new Scan Config, you'll have the ability to edit it (the wrench will not be greyed out)
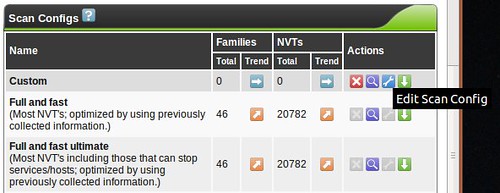
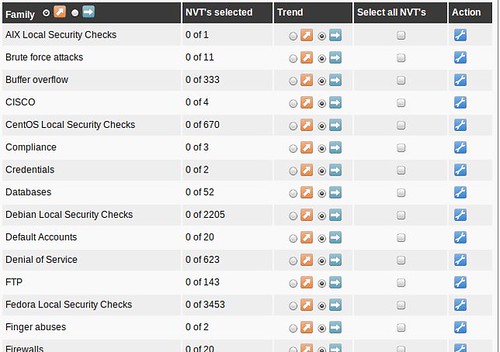
and you'll be faced with a huge assortment of scanning options allowing you to fine-tune your scan. You'll also see options for so-called NASL Wrappers, which are scripts that help OpenVAS utilize third-party tools such as nmap, nikto, w3af and others. Tuning your scan parameters is important, but complicated enough that it's beyond the scope of this series. Most vulnerability scanners I've used (Nessus, ISS, etc...) have a configuration section like this, and it's always a very, very deep rabbit-hole. Mastering this is a bit of an art, but I usually break the enterprise up into "classes" so that like-systems are scanned with relevant checks so I'm not throwing 5,000 futile Windows checks at the Linux servers in the DMZ, for example. Feel free to leave me a comment if you want me to discuss this kind of classification setup in more detail.
When building custom configs, I recommend using the existing scan configs as a template, and tweaking things from there to get your bearings. Try the "Full and very deep" scan first if you have any doubts. It's unlikely to knock anything off the network, but be careful! The "Trend" radio button selects whether this scan config will grow and import new NVT plugins or remain static with only the plugins you selected for that particular plugin family. If you start using OpenVAS frequently, you'll probably want to become familiar with tuning scan configs to get rid of false positives or enable more features.
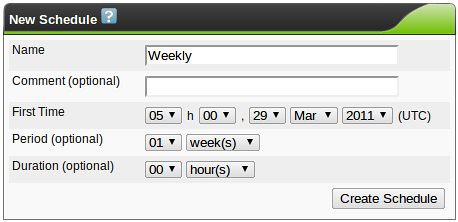
Schedules are triggers for one-time or recurring scans. It's not uncommon to schedule a network vulnerability scan to happen after business hours, so this option helps you there. I usually run weekly scans so that I can compare my security stance from one week to the next. Here, I've created a weekly trigger that runs at midnight (central time) every Tuesday. You can create as many schedules as you want, but none of them will actually do anything until you assign the schedule to a task. By the way, OpenVAS uses UTC for its clock. Keep that in mind.
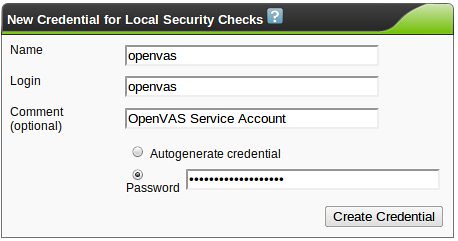
In the introduction, I had mentioned using credentials or agents to run local security checks. OpenVAS is pretty flexible here, so experiment with the credential options. Create credentials in Greenbone Security Assistant, and make sure that they match an account on the target system. I recommend creating a dedicated account with the bare minimum privileges needed to run the local security checks. In a Windows environment, consider using an active directory service account on the domain. Authenticated scans and local checks open up some of the most powerful features of many vulnerability scanners. I may cover the use of Agents later, but for now, they're beyond the "basics" scope of this post.
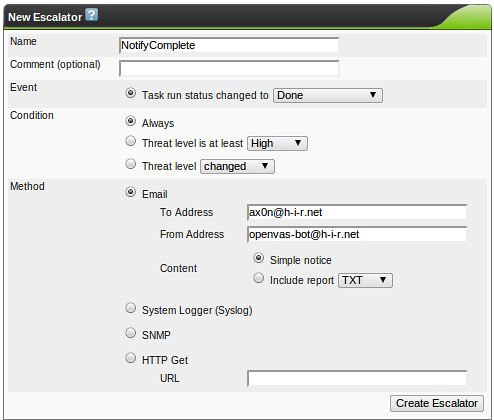
Escalator is a funny word for this feature, but this robust option gives you the ability to trigger events based on the completion of a scan. Here, I'm just configuring it to send an email to me when a scan has finished running. Note: you will probably have to install the "mailutils" package or some equivalent on Ubuntu for this to work.
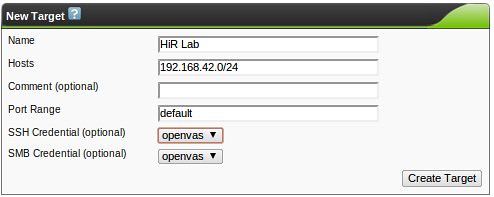
We can finally start picking what hosts or networks we want to scan with the "Targets" option. The target hosts can be single IP addresses, IP address ranges (192.168.0.1-192.168.0.23 or 192.168.0.1-23), CIDR networks like the example below, DNS names, or any combination of them separated by commas. I had mentioned setting up "classes" of scans earlier. Here, you may just insert a comma-separated list of similar servers, for example. The comment is optional, and the port range can also be a comma-separated list of individual port numbers or ranges. "default" uses all of the ports found in /usr/local/share/openvas/openvas-services, which contains over 8,000 ports, a far cry from 65,535. YMMV here. If you wish to use credentials, select them now.
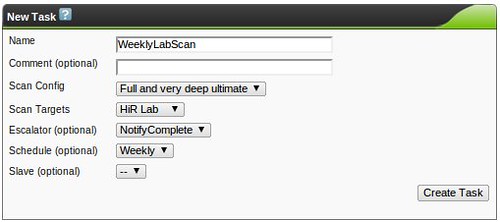
The moment you've probably been waiting for. Create a new task. This is where you'll get to put it all together and start scanning! Here, I assigned a weekly scan schedule. This will run on its own, using the schedule I defined earlier.
If you don't define a scan schedule, you'll end up with an item on the task list, but it won't run on its own until you hit the "Play" icon (Green triangle). I added a manual scan to the task list as well. You can see both the scheduled and manual scans waiting to run here:
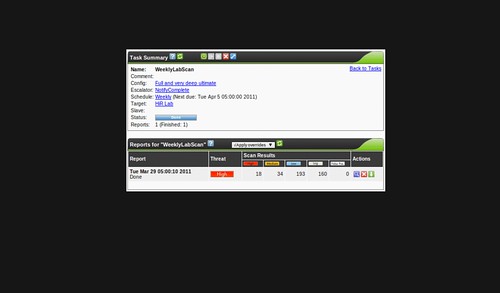
Clicking the spyglass icon on a task will show you a list of summaries from each time you've run the task. This weekly scan has only run one time, though, so you only see one summary here.
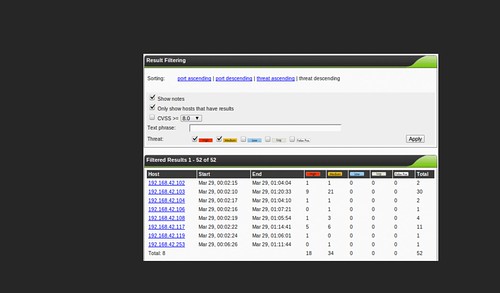
And clicking the spyglass on a scan summary pulls up the detailed results, which you can filter a number of ways. This page goes on and on, containing every item that was noted in the scan. You can also export the results a number of ways.
One thing that I like about OpenVAS is the fact that the web UI allows you to make remarks about the scan findings, assign arbitrary severity levels (including "false positive") and tune things so that future scans can take your professional opinion into account, if you so desire. You can perform these overrides or add notes to a single instance of a vulnerability or make sure that it applies to other hosts in the same scan. This can make OpenVAS extremely versatile.
Anyway, that's the basics of the OpenVAS scanner and Greenbone Security Assistant. Should be enough to get you started playing around in your own lab environments, or perhaps in a small office environment.
If you get serious about using OpenVAS, you may consider going with the Greenbone's Professional NVT Feed, which operates on a similar model to Tenable Security's Nessus ProfessionalFeed. Again, it's hard to compare OpenVAS and Nessus side by side, but they both try to fill the same niche. I've used both (and several other competing products) and I still can't say any one is actually better than another. The Greenbone Security Assistant Web UI seems like one of the best vulnerability scanner interfaces I've seen, though.

