This is a guest post by BIOSshadow. You can follow him on Twitter and at his blog, Geek Crack.
Pfsense is a free, as in speech and beer, firewall for home, business, and any other purpose you can think of. It's based on FreeBSD, so it's very stable and has a very good TCP/IP stack. It has a serious feature list.
I have to explain how little PfSense needs in the hardware department. My setup is an old desktop computer that a client gave me because it "went bad." The power supply unit blew out during a lightning storm in the middle of the night. Anyway, it's a single core Intel processor, I am not sure what speed, with 512 MB of RAM, and a 40 GB hard drive. Now the only reason I have 40 gig is because it was easier to keep in there than fight the case, and put in a 10 gig I had around. So any basic computer you have around will work. But as with any computer, the more memory the better. I will get into that later.
You will need a video card/monitor and keyboard and of course a Pfsense CD. USB keyboard will work, a PS/2 won't need to load extra drivers. After the install and a little configuring is done, you can remove the video card/monitor and the keyboard, you can do everything through the web panel or SSH connection, if you turn it on.
Now onto the setup. (Note: For the screenshots I am using VirtualBox. This for the screenshots only). When it boots up to the bootloader, you want to boot with default, either by waiting for the timer to run out or by hitting enter.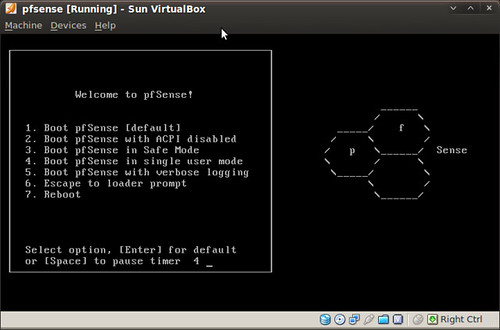
Now if you have two NICs, which I recommend, you do not need to setup VLANs, but you can. If you only have one NIC, you need to setup at least two VLANs.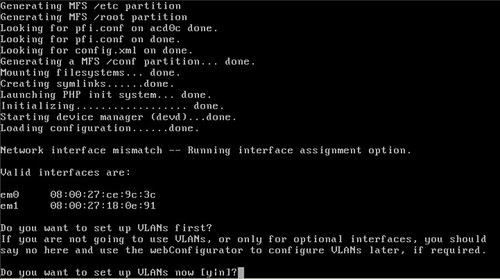
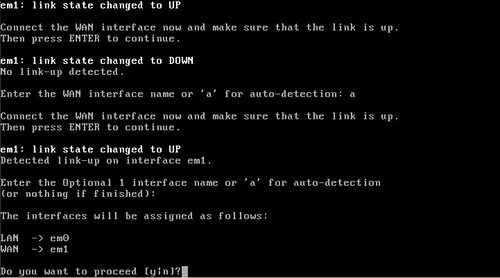
Now this is one of the great things about Pfsense that I can't find anywhere else: You unplug the ethernet cables, and it askes you to plug in the LAN cable into the LAN NIC. Then it does the same for the WAN cable and NIC. Now if you want to setup a DMZ with third NIC this where it do it.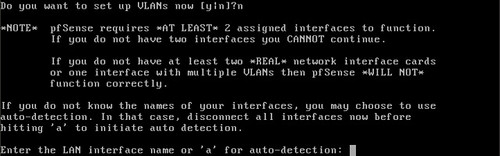
Pfsense will ask you if you want to proceed and then build the config files and startup all the daemons, like the Web Panel and others. Congrats! You have running Pfsense firewall, but everything is in memory and running from the CD. If you want run it like this then you are set, but if the power goes out you will have to set it up again using a backup config file or from scratch. If you want to install to a hard drive you will need to type "99" and hit enter to continue.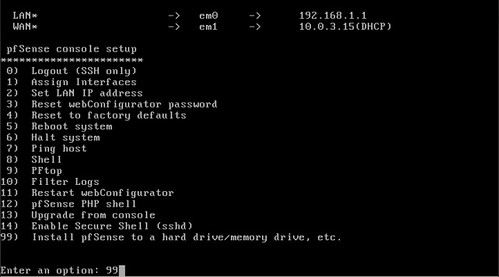
The hard drive installation is menu-driven and easy to use. If you are having issues, feel free to edit the setting and accept when done.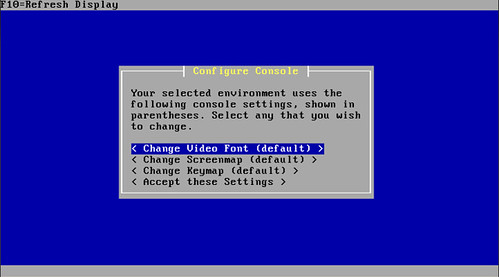
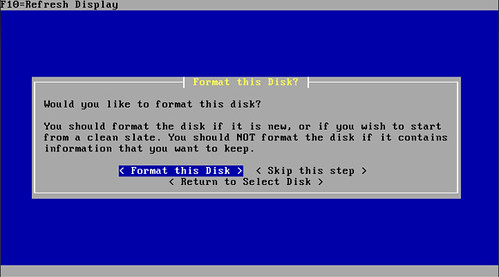
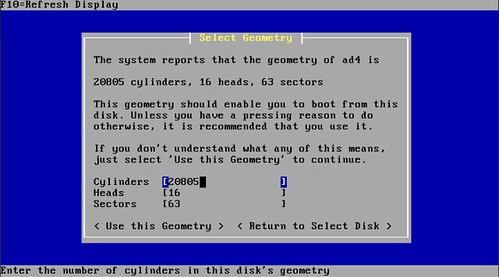
Select "Install PfSense" and select the hard drive you want to use. Format the disk and select "use this Geometry".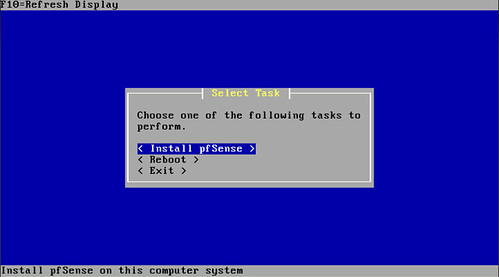
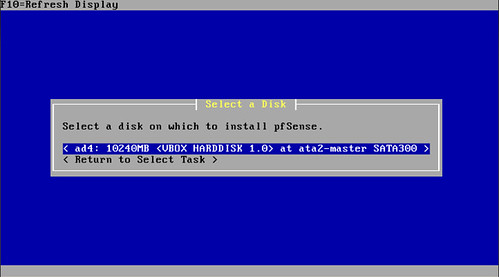
If you are lucky enough to have a muilti-processor system or are using a embedded system, select those options. Now remember this is "muilti processor" not "muilti-core processor".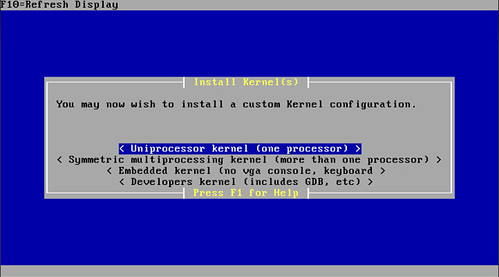
Now Pfsense is installed and ready to go. Just restart it and remove the disc.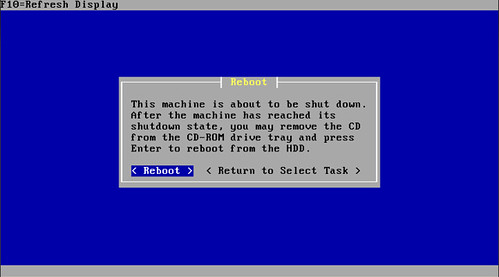
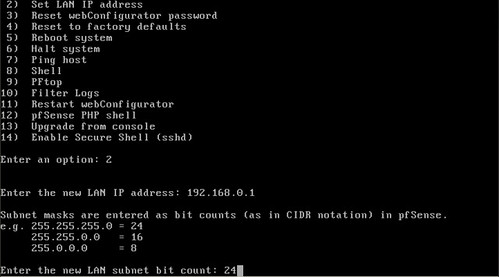
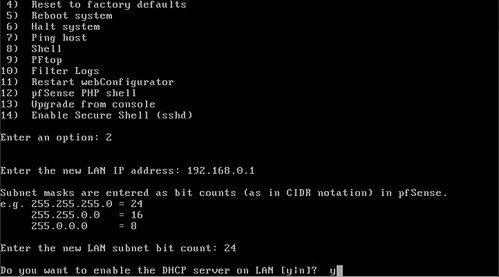
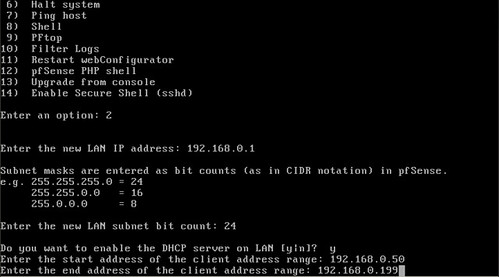
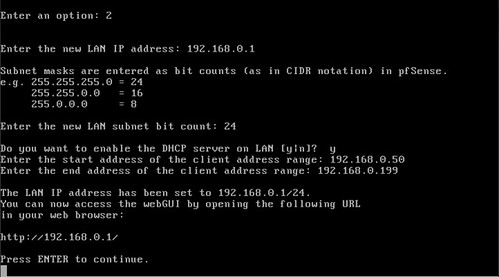
After the reboot, we will need to setup local IPs and their ranges. Unless, of course, you have a separate DHCP server, then set it up to connect to the server.
The IP settings are all up to you, I used a normal home setup for the sanity of my family (networked printers, NAS, and etc.) just remember the IP you give Pfsense, because you will need it to access the Web Panel.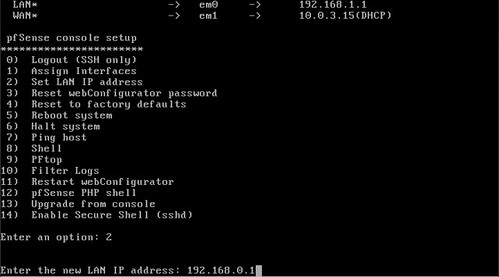
Now you are all set up. You can unplug the monitor and keyboard, and other stuff were using for set up.
Now back on your computer, open up a browser and go to the IP of Pfsense. The default username is "admin" and the default password is "pfsense".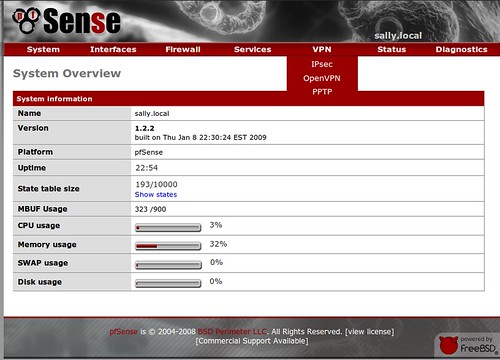
Of course, you want to change the password and if you want, you can change the username as well. To do so on the red navigation bar at the top, hover over system and click on General.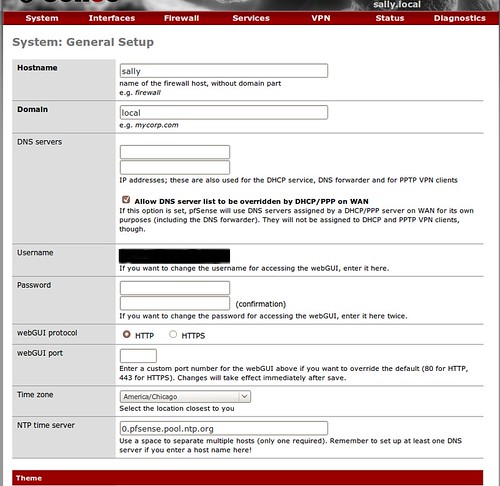
To enable SSH, which I recommend, you need to go the the Advanced section of the System Menu.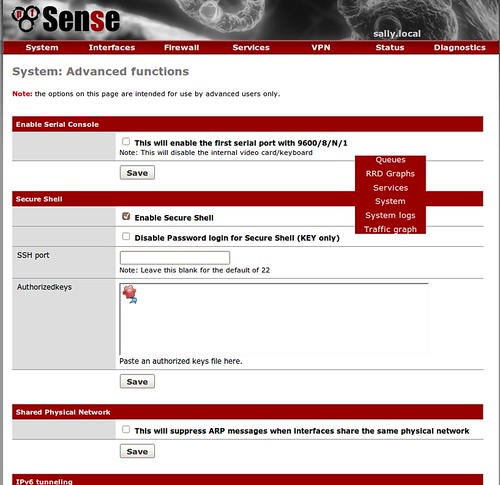
If your ISP is like mine, your MAC address is tied to the account and if you use it, you don't get access to the Internet. To edit it Go to Interfaces and then WAN.

Now you have working Pfsense firewall, have fun!
There are a few things Pfsense lacks, like a Squid proxy and A/V scanner. But it makes it up with its packages. It has quite a few packages, but remember: the more packages, processes and packets it handles, the more memory it uses and the lag increases. But they have packages for Snort, Squid, SquidGuard, and an A/V scanner.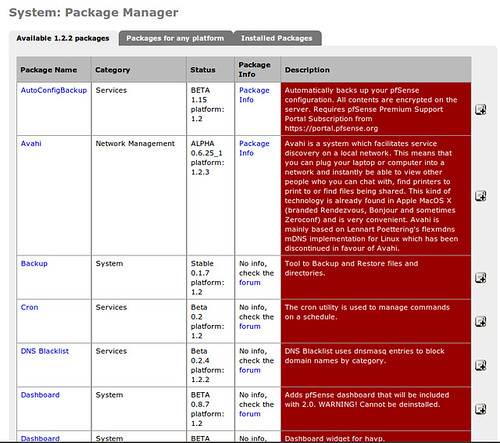
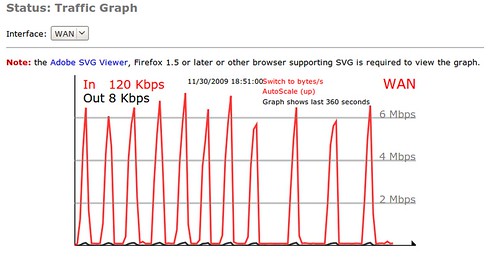
Well there it is: a completely setup and configured Pfsense, with A/V scanning, proxy and traffic monitor.
2009-12-22
Guest Post: Setting up a Pfsense firewall
![]()
blog comments powered by Disqus
Subscribe to:
Post Comments (Atom)


